In case you have not noticed, the United States of America has now gained the distinction of being the very first world power to be defeated by cyberwarfare. Our defeat in the Great Cyberwar of 2016 was so stunning and so complete that hardly any in our defeated nation even know that it has happened. In my posting Cyber Civil Defense, I warned that, since it was impossible for the government of the United States to fend off cyberattacks by foreign powers, that it was up to each individual citizen of the United States to stop believing in the stupid political memes to be found on the Internet. That is what we learned to do back in the 1950s when it was openly admitted by the United States government that we could not be protected from a nuclear attack by the Russian strategic bomber force. Instead, we were told to build private and public fallout shelters across the country. Unfortunately, nobody paid heed to my warnings and we now find ourselves living in a deeply divided and defeated post-cyberwar country that is politically paralyzed and incapable of even acting in its own best interest. How could this possibly have happened?
A Possible Explanation Based on Softwarephysics
The key finding of softwarephysics is that it is all about the interactions of self-replicating information. For more on that please see A Brief History of Self-Replicating Information. In this case, I contend that the dramatic defeat of the United States in the very first large-scale cyberwar resulted from a controlled manipulation of the interactions between political memes and domestic software by foreign and domestic powers that then went viral and ran amuck. Things are now so bad in postwar America, that I can already sense that my assertion has about 40% of the surviving Americans withdrawing to one tribal corner and the remainder withdrawing to another tribal corner in preparation for combat and that is the problem. So let's use some softwarephysics to see why. In softwarephysics, Homo sapiens is modeled as a hardware platform of carbon-based Intelligence 1.0 that primarily stores and replicates memes. So Homo sapiens is both a DNA survival machine and a meme survival machine that has a very dense and complex neural network that stores and replicates memes. In this view, Homo sapiens is an example of Deep Learning at its best and is far superior to anything that Intelligence 2.0 currently has running on silicon. This is a significantly different model than most people use on a daily basis. Most people simply do not consider themselves to be a part of the natural world. Instead, most people consider themselves to be a supernatural and immaterial spirit that is temporarily haunting a carbon-based body. In everyday life, this is a very useful delusion as I explained in The Ghost in the Machine the Grand Illusion of Consciousness but I do not think that it adequately explains our current predicament.
So let us all finally admit that we all have Minds that are infected with political memes just trying to self-replicate and that these political memes are just mindless forms of self-replicating information that do not necessarily have our best interests at heart, as outlined by Richard Brodie in Virus of the Mind: The New Science of the Meme (1996) and by Susan Blackmore in The Meme Machine (1999). These political memes are just trying to survive and self-replicate and have highjacked the greed, anger, hate and fear that DNA uses to ensure its own survival in the DNA survival machines known to us as Homo sapiens. In this view, these political memes are neither inherently "good" nor "bad" - they just are. Next, let us explore how the Russian FSB brilliantly used these facts to defeat the United States of America with cyberwarfare. Only a few Russians were lost in this cyberwar and perhaps there was not even a single American casualty through it all. What a spectacular victory! Contrast that to the 27 million Russians who died during the Great Patriotic War of World War II. Now how in the world could the Russian FSB manage to do this? Well, all they needed to do was to convert a good portion of Americans into unwitting Russian assets. Thanks to the bizarre electoral college process for electing a new president of the United States outlined in our Constitution, you do not even need to convert a majority of Americans into Russian assets. All you have to do is to convert more than 50% of those casting votes in certain key states into Russian assets. But how do you do that?
I just finished episode two Friends for the Moment of the new Netflix series Inside the Mossad. The Friends for the Moment episode covers how the Mossad, the Israeli intelligence agency, recruits foreign assets and manages those assets with Mossad operators. Now I am quite sure that the techniques portrayed in this episode are the very same techniques that are used by all of the intelligence agencies throughout the world, like the American CIA, the British MI6 and the Russian FSB. And there is nothing wrong with that. I find that the use of espionage by nations is far better than the use of war to achieve political ends. Think of the countless lives that espionage has saved compared to the millions lost on the battlefields of World War I and World War II. In Friends for the Moment, it is explained that the ultimate objective of recruiting a foreign asset is to get the asset to provide information and to perform actions that betray his country. This is not an easy thing to do. An operator must be very patient as he very gently and very carefully leads the asset down a path that ultimately leads to treason. The operator does this by using the same techniques that conmen use to trick and seduce normally honest people into giving up their money while in pursuit of a shady deal that is too good to be true.
For example, suppose an operator needs some photographs of a secret foreign installation in a Middle Eastern country and needs a foreign asset to obtain them. One approach would be to befriend a film student in the target country. Then the operator tells the potential asset that he has contacts in Hollywood and that his Hollywood contacts need some Middle Eastern stock footage for an upcoming film. All the film student needs to do is to take some footage along any road in the desert of his choosing. When the stock footage comes back, the operator heaps praise upon the potential asset and explains to the potential asset that his Hollywood contacts would like to buy the footage for a very good price. Next, the operator tells the asset that his Hollywood contacts need some stock footage of a chemical plant or oil refinery - anything with lots of distillation towers and piping. When that footage is returned, it is again purchased for a very good price. Next, the operator then tells the asset that his Hollywood contacts really liked all the work that the asset has already performed, but that they are especially interested in some footage of a specific facility along a certain road and would like to contract the asset to provide that footage. This goes on and on as the asset unwittingly provides more and more sensitive footage. At some point, the "penny drops". This is when the asset finally realizes that he has been the victim of a con and finally comes to grips with the implications of the very serious things that he has been doing. By that time, it is too late for the asset. There is far too much incriminating evidence that the asset has committed traitorous acts for money. At this point, the operator can then request the asset to perform obviously traitorous acts because the operator now has a great deal of leverage over the asset. None of this has to be explicitly articulated. Both the operator and the asset now know what is going on even if they do not specifically lay it out in words.
For example, suppose you were a brash young real estate developer with a string of bankruptcies that prevented you from obtaining large loans for real estate deals from the major banks. A number of Russian FSB operators might approach you with the offer of investing in your real estate deals. Then, over a number of years, it might become apparent that these investments by Russian FSB operators might be deemed to be money laundering activities by the authorities. At some point, the "penny drops" without a spoken word needed between the Russian FSB operators and their newly recruited asset. Both parties now know what is truly going on and that it is too late for the asset to back out now.
The Power of Parasitic Political Memes
In SETS - The Search For Extraterrestrial Software I discussed the potential power of parasitic interstellar self-replicating information. In particular, I quoted a passage from Parasite Rex – Inside the Bizarre World of Nature’s Most Dangerous Creatures (2000) by Carl Zimmer which follows an earlier tale about how a certain fungus makes house flies die at the top of blades of grass so that they can drop spores onto other house flies.
“Another species of fluke can be found in the meadows of Europe and Asia, along with a few in North America and Australia. Known as Dicrocoelium dendriticum, or the lancet fluke, it makes cows and other grazers its host as an adult, and the cows spread their eggs in their manure. Hungry snails swallow the eggs, which hatch in their intestines. They drill through the wall of a snail’s gut and settle in the digestive gland. There the flukes produce a generation of cercariae, which make their way to the snail’s surface. The snail tries to defend itself from the parasites by blocking them off with walls of slime. The slime balls up around the cercariae, which the snail coughs up and leaves behind in the grass.
Next, along comes an ant. To an ant, a slimeball is positively delicious. Along with the slime, the ant may also swallow hundreds of lancet flukes as well. The parasites slide down into its gut, and they then wander for a while through its body, eventually moving to the cluster of nerves that control the ant’s mandibles. The parasites all travel together on this trip, but after visiting the nerves, they split up. Most of the lancet flukes head back to the abdomen, where they form cysts, but one or two stay behind in the ant’s head.
There they do some parasitic voodoo on their hosts. As evening approaches and the air cools, the ants find themselves drawn away from their fellow ants on the ground and upward to the top of a blade of grass. Like flies infected with a fungus, the ants clamp down on the tip of the grass. But the lancet fluke has a different goal than the fungus does. The fungus uses its host as a catapult to shower its spores on other insects. The lancet fluke can continue to live only if it can get inside its final host, a mammal. Clamped to the tip of a grass blade, the infected ant is likely to be devoured by a cow or some other grazer passing by. When the ant tumbles into the cow’s stomach, the flukes burst out and make their way to the cow’s liver, where the flukes will live as adults.
But the lancet fluke, like the fungus, is very aware of the passing of time. If the ant sits the whole night without being eaten and the sun rises, the fluke lets the ant loosen its grip on the grass. The ant scurries back down to the ground and spends the day acting like a regular insect again. If the host were to bake in the heat of the direct sun, the parasite would die with it. When evening comes again, it sends the ant back up a blade of grass for another try.”
Now just think of what the Russian FSB operators have been able to achieve by simply exploiting the already existing greed, anger, hate and fear of their American hosts by spreading parasitic political memes and using our very own social media software platforms to do it! They have us in a trade war with China, making friends with our former adversaries in North Korea and Russia, investigating the counterespionage wings of our CIA and FBI for wrongdoing, forsaking all of our traditional American values, at odds with Canada to the north and Mexico to the south and making enemies of our former NATO allies, all while we cozy up to every fascist Alt-Right regime on the planet. We are now also politically paralyzed and in no way capable of leading the free world as we once did. In fact, we cannot even manage our own affairs. And like an infected ant, we do not even know that the world order has drastically changed for at least a decade or more.
But do not blame the Russian FSB for our present situation. We did this to ourselves. We started to climb out onto this ledge all by ourselves about 60 years ago. The Russian FSB only had to give us a gentle nudge into political oblivion.
Postwar Recovery
Another thing that we learned back in the 1950s was that immediately following a major nuclear war, it was expected that it would take an extended period of time for the federal government of the United States to reconstitute itself and recover. The same would be true for the local and state governments, so it was important for individual citizens to help out with the postwar recovery process. Otherwise, the entire United States might descend into a number of tribal groups ruled by local warlords. I would like to suggest that postwar America has indeed descended into two tribal camps following the Great Cyberwar of 2016 and that it is now up to the survivors to recover what we once had. Now kids were taught civics back in the 1950s and so we knew about how the United States Constitution and the federal government were supposed to work. Since civics is hardly ever even mentioned these days, let's review some basic civics to help with our postwar recovery.
The United States Constitution was a product of the 18th-century Enlightenment and the 17th-century Scientific Revolution. These philosophical movements brought forth the heretical proposition that rational thought, combined with evidence-based reasoning, could reveal the absolute truth, and allow individuals to actually govern themselves, without the need for an authoritarian monarchy. This change in thinking led to the 18th-century Enlightenment and brought forth the United States of America as a self-governing political entity. But unfortunately, the United States of America has always been a very dangerous experiment in human nature to see if the masses could truly govern themselves, without succumbing to the passions of the mob. That is where the genius of the United States Constitution comes into play. The United States Constitution sets up a representative republic designed for an electorate that is only mildly paying attention to the events of the day but that can sometimes get riled up over certain issues. The representatives of this largely ill-informed electorate can also many times become scoundrels. On the face of it, it would appear that such a system could not possibly work. But it does work because the United States Constitution places many layers between the electorate and the governing bodies and has a large number of checks and balances to limit the powers of the political representatives.
In 1651, Thomas Hobbes published The Leviathan, in which he argued against the divine right of kings, but maintained the absolute supremacy of the monarchy. In The Leviathan, Hobbes argued that in “a state of nature" without government, life would be totally insecure. Under such conditions, people should willingly surrender their civil liberties to an absolute sovereign, who would protect them from all dangers. Hobbes argued that the sovereign's power was absolute - he made the law, he was the decider, and no other institution could limit the sovereign’s power. This was the position of the Loyalists or Tories during the American Revolutionary War, who comprised about 25% of the population. The Tories were 18th-century conservatives who wished to remain loyal to King George during the Revolution and fought on the side of King George to preserve his sovereignty over the colonies. On the other hand, about 25% of the population were 18th-century liberals like George Washington, Thomas Jefferson, and John Adams who were followers of the 18th-century Enlightenment that rejected the ideas of Hobbes and believed that people could live in a state of liberty and self-governance tempered by individual responsibility. Many of the Founding Fathers had a great distrust of the Powers That Be. These anti-Federalist Democratic-Republicans, led by Thomas Jefferson and James Madison, had a great fear that Alexander Hamilton’s Federalist theories would result in the presidency becoming a new sovereignty in a Hobbesian sense, like the King George they had just freed themselves from. In response, they were instrumental in amending the newly minted Constitution of the United States (1787) with the Bill of Rights (1791) to limit the powers of the Powers That Be. Since political movements are meme-complexes and subject to change, it is interesting how the Jeffersonian 18th-century liberal concepts of a federal government, with very limited powers, evolved into 20th-century conservativism, while Hamiltonian 18th-century conservativism, which advocated a strong central government, evolved into 20th-century liberalism. Now it seems that 21st-century liberalism is returning to its 18th-century roots and so is 21st-century conservativism, in that 21st-century liberals seem to be more wary of the president of the United States trying to become a king with absolute powers than do 21st-century conservatives, who support an unrestrained president to achieve their political goals.
Conclusion
As we have seen, the Great Cyberwar of 2016 was devastating for the United States of America and it will take several decades for us to recover from it. The most important thing for us to remember is that we did this to ourselves, and we did this to ourselves because of parasitic political memes infecting the vast neural networks in our heads that we call our Minds. So we all need to go on a twelve-step program, similar to the ones used to deprogram cult members, to help bring back some political civility. The first step is to recognize that our current political worldviews probably contain many false memes. One way to remove false memes from your political worldview is to use the Scientific Method that I outlined in How To Think Like A Scientist. Galileo pointed out that the truth is not afraid of scrutiny, the more you pound on the truth, the more you confirm its validity. False memes do not stand up well to close scrutiny as I described in The Danger of Believing in Things. I contend that the only way to restore the United States of America is to go back to our foundations in the 18th-century Enlightenment and the 17th-century Scientific Revolution. At one time, these memes were so prevalent and were considered to be so American that no one even bothered to bring them up because they were so obvious. Perhaps that is when we started to lose our way as Americans.
Comments are welcome at scj333@sbcglobal.net
To see all posts on softwarephysics in reverse order go to:
https://softwarephysics.blogspot.com/
Regards,
Steve Johnston
Monday, April 22, 2019
Life in Postwar America After Our Stunning Defeat in the Great Cyberwar of 2016


Tuesday, April 02, 2019
The Role of Multilevel Selection in the Evolution of Software
I just finished reading The Social Conquest of Earth (2012) by the very famous evolutionary biologist Edward O. Wilson who is the world's expert on myrmecology, the study of ants. Edward O. Wilson also became one of the founding fathers of sociobiology, the explanation of social behaviors in terms of evolutionary biological thought, when he published his book Sociobiology: The New Synthesis (1975). In The Social Conquest of Earth, Wilson presents a new theory by Martin Nowak, Corina Tarnita and himself for the rise of eusocial behavior in species by means of multilevel selection. Now Darwin's theory of evolution maintains that given a system subject to the natural processes of inheritance, innovation and natural selection that things will have no choice but to change into new things that are better adapted to the current state of affairs. But for the past 160 years, ever since On the Origin of Species (1859) was first published, people have always had a difficult time with figuring out on exactly what level of organization natural selection works. For carbon-based life, does natural selection work at the level of an entire species, a group of individuals in a species, a sole individual in a species, groups of genes in a species, a single gene of a species or at the level of a single DNA base pair? Softwarephysics agrees with Richard Dawkins' contention that most selection for carbon-based life operates at the level of the individual gene as proposed in his The Selfish Gene (1976). Multilevel selection, on the other hand, maintains that for each individual member of a social species there is a balance between individual selection and group selection. Individual selection encourages the selfish behavior of individuals in order to replicate the genes of each individual in a society, and those selfish behaviors are governed by the selfish genes of the individual. Group selection, on the other hand, encourages the selfless altruistic behaviors of individuals that advance the survivability of an entire societal group. Clearly, the opposing concepts of individual selection and group selection are at odds with each other and have been much debated.
The Social Conquest of Earth covers in detail many observations of eusocial behavior in both certain species of social insects and the human species Homo sapiens and then goes on to explain the rise of such behaviors with the new theory for the rise of eusocial species that differs from the current standard theory. Thus, The Social Conquest of Earth is a very interesting popular book that covers the 2010 paper first published in Nature by Martin Nowak, Corina Tarnita and Edward O. Wilson that is available at:
The Evolution of Eusociality
https://www.ncbi.nlm.nih.gov/pmc/articles/PMC3279739/
But The Social Conquest of Earth then goes on to expand this new theory for the origin of eusocial behavior in Homo sapiens.
The Evolution of Eusocial Behavior by Means of Multilevel Selection
This new theory for the rise of eusocial behavior can best be summarized by the last paragraph of the above paper:
To summarize very briefly, we suggest that the full theory of eusocial evolution consists of a series of stages, of which the following may be recognized:
1. The formation of groups.
2. The occurrence of a minimum and necessary combination of preadaptive traits, causing the groups to be tightly formed. In animals at least, the combination includes a valuable and defensible nest.
3. The appearance of mutations that prescribe the persistence of the group, most likely by the silencing of dispersal behavior. Evidently, a durable nest remains a key element in maintaining the prevalence. Primitive eusociality may emerge immediately due to springloaded preadaptations.
4. Emergent traits caused by the interaction of group members are shaped through natural selection by environmental forces.
5. Multilevel selection drives changes in the colony life cycle and social structures, often to elaborate extremes.
The main idea of this new theory is that once a group of individuals forms, the group itself can become another environmental factor amongst the many environmental selection factors that select for genes that enhance the survivability of the individual. Being a member of a group that has been selected for genes with altruistic behaviors can certainly enhance the survivability of an individual up to a point. But these altruistic genes necessarily have to be balanced with selfish genes that only benefit the survivability of the individual too. Thus develops the coevolutionary battle between group selection and individual selection that is known as multilevel selection.
The Evolution of Eusocial Behavior by Means of Kin Selection
The more conventional theory for the origin of altruistic and eusocial behavior can also be summarized by the above paper as:
For the past four decades kin selection theory has had a profound effect on the interpretation of the genetic evolution of eusociality and, by extension, of social behavior in general. The defining feature of kin selection theory is the concept of inclusive fitness. When evaluating an action, inclusive fitness is defined as the sum of the effect of this action on the actor’s own fitness and on the fitness of the recipient multiplied by the relatedness between actor and recipient, where “recipient” refers to anyone whose fitness is modified by the action.
The idea was first stated by J. B. S. Haldane in 1955, and a foundation of a full theory was laid out by W. D. Hamilton in 1964. The pivotal idea expressed by both writers was formalized by Hamilton as the inequality R > c/b, meaning that cooperation is favored by natural selection if relatedness is greater than the cost to benefit ratio. The relatedness parameter R was originally expressed as the fraction of the genes shared between the altruist and the recipient due to their common descent, hence the likelihood the altruistic gene will be shared. For example, altruism will evolve if the benefit to a brother or sister is greater than 2 times the cost to the altruist (R = 1/2) or 8 times in case of a first cousin (R = 1/8).
Personally, I have never been a big fan of kin selection and inclusive fitness theory. I know that Orgel's Second Rule states that evolution is much smarter than I am, but I have never been able to see a way for genes to figure out the c/b ratio and the degree of relatedness R for very distant relatives by the standard means of inheritance and innovation honed by natural selection. Yes, taking care of your offspring should have a relatively low c/b ratio for your genes since your offspring have 1/2 of your genes and an R of 1/2, at least if you are the mother. But even so, many species do not do that, and even for those that do, the fathers never really know for sure. When performing the c/b ratio calculation for contacting a very distant relative of apparently very low relatedness R, I just keep thinking about all of those surprised customers on 23andMe commercials who may have found themselves in all sorts of family squabbles at Thanksgiving dinner. However, I can see a way for inheritance, innovation and natural selection to stumble upon the fact that living in a group of similar organisms with a shared gene pool can sometimes improve the survivability of the individual when individual selection and group selection operate in a mutual parasitic/symbiotic manner.
Multilevel Selection Generates Controversy
The above paper generated quite a bit of controversy in academia that got a bit nasty. For example, see the 2011 response by F. Rousset and S. Lion at:
Much ado about nothing: Nowak et al.’s charge against inclusive fitness theory
https://onlinelibrary.wiley.com/doi/full/10.1111/j.1420-9101.2011.02251.x
After reading the above paper, I was taken aback a bit by the level of the academic "Nature, red in tooth and claw" concerning the topic. For an outsider, this violent academic controversy looks very much like two memes in mortal combat fighting to the death. Strangely, I think that Richard Dawkins' concept of Replicators and memes, first expressed in The Selfish Gene, might be key to resolving this controversy and that some of the findings of softwarephysics might help to soothe some of these very troubled academic waters.
From the perspective of softwarephysics, the new multilevel selection model for the rise of eusocial species seems almost self-evident because we see it at work today with the rise of software, echoing James Hutton's "The present is key to the past". The multilevel selection of individual selection and group selection working together in a coevolutionary manner is just a recognition of the fact that there is more than one single form of self-replicating information on the planet and that all of these many forms of self-replicating information are coevolving together. In fact, we now have at least five major forms of self-replicating information on the planet all coevolving with each other. Again, for newcomers to softwarephysics, let me recap the essentials of self-replicating information:
Self-Replicating Information – Information that persists through time by making copies of itself or by enlisting the support of other things to ensure that copies of itself are made.
Over the past 4.56 billion years we have seen five waves of self-replicating information sweep across the surface of the Earth and totally rework the planet, as each new wave came to dominate the Earth:
1. Self-replicating autocatalytic metabolic pathways of organic molecules
2. RNA
3. DNA
4. Memes
5. Software
Software is currently the most recent wave of self-replicating information to arrive upon the scene and is rapidly becoming the dominant form of self-replicating information on the planet. For more on the above see A Brief History of Self-Replicating Information.
The Characteristics of Self-Replicating Information
All forms of self-replicating information have some common characteristics:
1. All self-replicating information evolves over time through the Darwinian processes of inheritance, innovation and natural selection, which endows self-replicating information with one telling characteristic – the ability to survive in a Universe dominated by the second law of thermodynamics and nonlinearity.
2. All self-replicating information begins spontaneously as a parasitic mutation that obtains energy, information and sometimes matter from a host.
3. With time, the parasitic self-replicating information takes on a symbiotic relationship with its host.
4. Eventually, the self-replicating information becomes one with its host through the symbiotic integration of the host and the self-replicating information.
5. Ultimately, the self-replicating information replaces its host as the dominant form of self-replicating information.
6. Most hosts are also forms of self-replicating information.
7. All self-replicating information has to be a little bit nasty in order to survive.
8. The defining characteristic of self-replicating information is the ability of self-replicating information to change the boundary conditions of its utility phase space in new and unpredictable ways by means of exapting current functions into new uses that change the size and shape of its particular utility phase space. See Enablement - the Definitive Characteristic of Living Things for more on this last characteristic. That posting discusses Stuart Kauffman's theory of Enablement in which living things are seen to exapt existing functions into new and unpredictable functions by discovering the “AdjacentPossible” of springloaded preadaptations.
From the above list of common characteristics, we see that a group of individuals could in effect become a form of self-replicating information that skips down through the generations, largely unscathed by time, as a self-sustaining network of altruistic and selfish genes coevolving together in a stable manner that balances both the survivability of the group and the individuals in the group. I know that group selection is frowned upon by many evolutionary biologists but think of a ripple on a still pond. The ripple is a wave of information that persists through time as a disturbance of the behaviors of countless numbers of individual water molecules. There are no genes for ripples, yet ripples do exist as each water molecule responds to the local forces of nature, and ripples could even be used to transfer information. That's how you hear someone speaking. In order to better understand the nature of self-replicating information, it helps to have some understanding of the nature of information in general with the understanding that the concept of information is still a bit fuzzy. Please see The Demon of Software, Is Information Real?, and Some More Information About Information.
The important thing to keep in mind is that all of the five major forms of self-replicating information now on the planet are also coevolving together in a parasitic/symbiotic manner. For example, standard DNA viruses and transposons are examples of parasitic DNA that are coevolving with all of the other carbon-based life forms on the Earth, from bacteria all the way up to the most complicated multicellular organisms. Retroviruses, like the AIDS virus, are examples of parasitic RNA that are also coevolving with all forms of carbon-based life. Prions are examples of geometrical configurations of certain organic molecules self-replicating and coevolving with all of the other forms of carbon-based life too. And now we have the memes and software coevolving too on many levels.
Multilevel Selection in the Evolution of Software
Currently, the memes are the dominant form of self-replicating information on the planet. Over the past 200,000 years, the memes residing within the neural networks of Homo sapiens have cut down the forests for agriculture, mined minerals from the ground for metals, burned coal, oil, and natural gas for energy, releasing huge quantities of carbon dioxide that its predecessors had previously sequestered in the Earth, and have even modified the very DNA, RNA, and metabolic pathways of its predecessors. But now that software is seemingly on the rise, like all of its predecessors, software has entered into a very closely coupled parasitic/symbiotic coevolving relationship with the memes. Currently, software is created by the programming memes to be found within the minds of programmers and is replicated by the minds of end-users in a parasitic/symbiotic manner that then allows many other memes to self-replicate. This will likely continue for the next 20 - 50 years until software is finally able to write itself. For more on that please see The Economics of the Coming Software Singularity. In the meantime, software currently evolves in a multilevel fashion that takes advantage of both individual and group selection processes. Programmers are now called developers so I will use that terminology going forward. Developers are broken up in IT departments into tribes of 5 – 30 developers working under a single chief, or IT application development manager. Each application development tribe of 5 – 30 developers is a semi-isolated population of developers, dedicated to supporting a number of applications, or possibly, a small segment of a very large application like Microsoft Word. But to fully understand how individual and group selection processes are run in these development tribes please see How Software Evolves.
The memes are still the most dominant form of self-replicating information on the planet and have formed a very strong parasitic/symbiotic relationship with software. The memes foster the evolution of software by supporting and funding software development, and software is now responsible for replicating most memes. In the modern world, beyond personal word-of-mouth communications, memes can now only self-replicate with the aid of software, and the poor memes in our heads have become Facebook and Twitter addicts. Since all forms of self-replicating information are simply forms of mindless information responding to the blind Darwinian forces of inheritance, innovation and natural selection that cannot think, they cannot participate in a conspiracy-theory-like fashion to take over a planet, and they certainly do not need to do so to be successful. The blind Darwinian forces of inheritance, innovation and natural selection have never required a designer to take over a planet in the past and will not need one in the future either.
So we are now living in one of those very rare times when a new form of self-replicating information, in the form of software, is coming to predominance. For biologists, this presents an invaluable opportunity because software has been evolving about 100 million times faster than living things over the past 78 years, or 2.46 billion seconds, ever since Konrad Zuse first cranked up his Z3 computer in May of 1941. The evolution of software over that period of time is the only history of a form of self-replicating information that has actually been recorded by human history. In fact, the evolutionary history of software has all occurred within a single human lifetime, and many of those humans are still alive today to testify as to what actually had happened, something that those working on the origin of life on the Earth and its early evolution can only try to imagine.
The Need to Revive Memetics in Sociobiology
In The Social Conquest of Earth, Edward O. Wilson goes on to apply the new multilevel selection theory for the rise of eusocial behavior to the rise of eusocial behavior in human societies using the same five steps that are proposed to bring forth eusocial behavior in social insects. I think that such an analysis could benefit greatly by reviving the recently discarded science of memetics. For more on that please see
How to Use Softwarephysics to Revive Memetics in Academia and Susan Blackmore's brilliant TED presentation at:
Memes and "temes"
https://www.ted.com/talks/susan_blackmore_on_memes_and_temes
Note that I consider Susan Blackmore's temes to really be technological artifacts that contain software. After all, a smartphone without software is simply a flake tool with a very dull edge.
I think that memetics was discarded prematurely by sociobiologists because, deep down, humans simply do not consider themselves to be a part of the natural world. Instead, most people consider themselves to be a supernatural and immaterial spirit that is temporarily haunting a carbon-based body. In everyday life, this is a very useful delusion as I explained in The Ghost in the Machine the Grand Illusion of Consciousness but it is an impediment that has seriously affected many scientific disciplines. Susan Blackmore pointed out in The Meme Machine (1999), that we are not so much thinking machines as we are copying machines and that it was "memetic-drive" that was responsible for creating our extremely large brains, and also our languages and cultures as well, in order to store and spread memes more effectively. Similarly, it was the relentless demands of software over the years for more and more CPU-cycles and memory that provided the "software-drive" that was responsible for the rapid advance of computing hardware. For a brief history of the effects that "software-drive" had on the prodigious advances of computing hardware, see the last half of Did Carbon-Based Life on Earth Really Have a LUCA - a Last Universal Common Ancestor?. In The Meme Machine, Susan Blackmore also goes on to point out that the memes at first coevolved with the genes during their early days, but have since outrun the genes because the genes could simply not keep pace when the memes began to evolve millions of times faster than the genes. The same thing is happening before our very eyes to the memes, with software now rapidly outpacing the memes. Software is now evolving thousands of times faster than the memes, and the memes can simply no longer keep up.
Comments are welcome at scj333@sbcglobal.net
To see all posts on softwarephysics in reverse order go to:
https://softwarephysics.blogspot.com/
Regards,
Steve Johnston
Thursday, March 21, 2019
The Primal Memes of Bacteria
In Programming Clay and Crocheting Software, I explained that since the origin of software was such a hodge-podge of precursors, false starts, and failed attempts that it was nearly impossible to pinpoint an exact date for its origin. And I think the same is true for all forms of self-replicating information, including carbon-based life. Again, for newcomers to softwarephysics, let me recap the essentials of self-replicating information:
Self-Replicating Information –
Information that persists through time by making copies of itself or by
enlisting the support of other things to ensure that copies of itself are made.
Over the past 4.56 billion years we have seen five waves
of self-replicating information sweep across the surface of the Earth and
totally rework the planet, as each new wave came to dominate the Earth:
1.
Self-replicating autocatalytic metabolic pathways of organic molecules
2.
RNA
3. DNA
4. Memes
5. Software
Software is currently the most
recent wave of self-replicating information to arrive upon the scene and is
rapidly becoming the dominant form of self-replicating information on the
planet. For more on the above see A Brief History of Self-Replicating Information.
The Characteristics of Self-Replicating Information
All forms of self-replicating information have some common characteristics:
1. All self-replicating information evolves over time through the
Darwinian processes of inheritance, innovation and natural selection, which endows
self-replicating information with one telling characteristic – the ability to
survive in a Universe dominated by the second law of thermodynamics and
nonlinearity.
2. All self-replicating information begins spontaneously
as a parasitic mutation that obtains energy, information and sometimes matter
from a host.
3. With time, the parasitic self-replicating information
takes on a symbiotic relationship with its host.
4. Eventually, the
self-replicating information becomes one with its host through the symbiotic
integration of the host and the self-replicating information.
5.
Ultimately, the self-replicating information replaces its host as the dominant
form of self-replicating information.
6. Most hosts are also forms of
self-replicating information.
7. All self-replicating information has to
be a little bit nasty in order to survive.
8. The defining
characteristic of self-replicating information is the ability of
self-replicating information to change the boundary conditions of its utility
phase space in new and unpredictable ways by means of exapting current functions
into new uses that change the size and shape of its particular utility phase
space. See Enablement
- the Definitive Characteristic of Living Things for more on this last
characteristic.
The Rise of the Memes
In this posting, I would like to examine the origin of the memes more closely. Currently, the memes are the dominant form of self-replicating information on the planet. These memes are being replicated by the species Homo sapiens. Homo sapiens is a carbon-based DNA survival machine that runs on the old
metabolic pathways of organic molecules, RNA and DNA of yore, but also has a very large neural network that is capable of storing and replicating large numbers of self-replicating memes. Richard Dawkins first established the concept of the meme in his brilliant The Selfish Gene (1976). The concept of memes was later advanced by Daniel Dennett in Consciousness Explained (1991) and Richard Brodie in Virus of the Mind: The New Science of the Meme (1996), and was finally formalized by Susan Blackmore in The Meme Machine (1999). For those of you not familiar with the term meme, it rhymes with the word “cream”. Memes are cultural artifacts that persist through time by making copies of themselves in the minds of human beings and were first recognized by Richard Dawkins in The Selfish Gene. Dawkins described memes as “Examples of memes are tunes, ideas, catch-phrases, clothes fashions, ways of making pots or of building arches. Just as genes propagate themselves in the gene pool by leaping from body to body via sperms or eggs, so memes propagate themselves in the meme pool by leaping from brain to brain via a process which, in the broad sense, can be called imitation.”. For more on this, see Susan Blackmore's brilliant TED presentation at:
Memes and "temes"
https://www.ted.com/talks/susan_blackmore_on_memes_and_temes
Note that I consider Susan Blackmore's temes to really be technological artifacts that contain software. After all, a smartphone without software is simply a flake tool with a very dull edge.
Over the past 200,000 years, the memes residing within the neural networks of Homo sapiens have cut down the forests for agriculture, mined minerals from the ground for metals, burned coal, oil, and natural gas for energy, releasing the huge quantities of carbon dioxide that its predecessors had previously sequestered in the Earth, and have even modified the very DNA, RNA, and metabolic pathways of its predecessors. But now that software is seemingly on the rise, like all of its predecessors, software has entered into a very closely coupled parasitic/symbiotic relationship with the memes. In today's world, memes allow software to succeed, and software allows memes to replicate. So the current rise of software to predominance is just another example of mother nature at work. All forms of self-replicating information are simply forms of mindless information responding to the blind Darwinian forces of inheritance, innovation and natural selection. Since all forms of self-replicating information cannot think, they cannot participate in a conspiracy-theory-like fashion to take over a planet, and they certainly do not need to do so to be successful.
The Very Early Origin of the Memes
Now all along, I have unwittingly maintained the conventional wisdom that the memes first arose in the minds of Homo sapiens about 200,000 years ago. But all of that changed after viewing the very enlightening TED presentation of nanophysicist Fatima AlZahra'a Alatraktch at:
To detect diseases earlier, let's speak bacteria's secret language
https://www.ted.com/talks/fatima_alzahra_a_alatraktchi_to_detect_diseases_earlier_let_s_speak_bacteria_s_secret_language?utm_source=newsletter_weekly_2019-03-30&utm_campaign=newsletter_weekly&utm_medium=email&utm_content=top_right_button
This very interesting TED presentation really got me to thinking. Perhaps the very earliest of memes did not first arise a mere 200,000 years ago. Perhaps they really first came to be about four billion years ago with the appearance of the very first bacteria! As we saw in Susan Blackmore's TED presentation, the distinguishing characteristic of a meme is that it is a copied form of information that passes from one individual organism to another. From Fatima AlZahra'a Alatraktch's TED presentation we see that the organism need not be a member of the species Homo sapiens, it might just be a simple prokaryotic bacterium. Yes, the memes that are passed from one bacterium to another may consist only of a single molecule, but as I explained in The Ghost in the Machine the Grand Illusion of Consciousness, the memes in the vast neural networks of Homo sapiens simply arise from the passage of neurotransmitter molecules from on neuron cell to another. This new view on the origin of the memes might just be characteristic of the origin of all new forms of self-replicating information. They may all have a very murky and nebulous beginning with no distinguishing "Aha!" moment of coming into existence, as I pointed out in Did Carbon-Based Life on Earth Really Have a LUCA - a Last Universal Common Ancestor?.
Comments are welcome at scj333@sbcglobal.net
To see all posts on softwarephysics in reverse order go to:
https://softwarephysics.blogspot.com/
Regards,
Steve Johnston
Saturday, January 12, 2019
The Deadly Dangerous Dance of Carbon-Based Intelligence
I just finished reading The Ends of the World - Volcanic Apocalypses, Lethal Oceans, and Our Quest to Understand Earth's Past Mass Extinctions (2017) by Peter Brannen. This is Peter Brannen's very first book, and after reading it, I am now, once again, pleasantly surprised to have found a new favorite author of mine to begin following. In The Ends of the World, Peter Brannen also relayed his many encounters with my favorite paleontologist, Peter Ward. Being able to make paleontology and geology seemingly interesting to the general public is truly an amazing talent that both Peter Brannen and Peter Ward have uniquely been able to achieve. I guess there must be something magical about the name Peter. Peter Ward has authored many other popular books on this topic that have deeply influenced the evolution of softwarephysics over time, including Rare Earth (2000), The Life and Death of Planet Earth (2002), Under a Green Sky (2007), The Medea Hypothesis (2009) and The Flooded Earth (2010).
I found The Ends of the World to be a very revealing study of past mass extinctions and the growing realization amongst paleontologists, geologists, geochemists and geophysicists that most likely all of the Big Five mass extinctions were brought on by geologically rapid disruptions of the carbon cycle on the Earth. Even the End-Cretacious (K-T) mass extinction 66 million years ago that killed off the dinosaurs may have really been caused by a two-punch knockout from an incoming asteroid that then triggered the massive flood-basalt eruptions of the Deccan Traps in India. In this new view, the asteroid impact was a disorienting left-handed jab that was then later followed up by a massive right-handed punch to the jaw. All through The Ends of the World, Peter Brannen reminds us that mankind is also now in the process of dramatically disturbing the carbon cycle of the Earth by dumping massive amounts of carbon dioxide into the Earth's atmosphere. While reading the book, this troubling fact kept bringing back my nagging obsession with Fermi's Paradox.
For me, the most disturbing mystery left facing mankind is coming to grips with a plausible explanation for Fermi’s Paradox, first proposed by Enrico Fermi over lunch one day in 1950:
Fermi’s Paradox - If the universe is just chock full of intelligent beings, why do we not see any evidence of their existence?
I have covered many explanations in other postings such as: A Further Comment on Fermi's Paradox and the Galactic Scarcity of Software, Some Additional Thoughts on the Galactic Scarcity of Software, SETS - The Search For Extraterrestrial Software and The Sounds of Silence the Unsettling Mystery of the Great Cosmic Stillness. The explanations for Fermi's Paradox usually fall into one of two large categories:
1. They really are out there but for some reason, we just cannot detect them.
2. We are truly alone in the Universe or at least we are alone in the Milky Way galaxy.
The first category of explanations is rather weak because it means that all forms of Intelligence in the Milky Way galaxy are intentionally or unintentionally hiding for one reason or another. The problem with the second category of explanations is that it is always very difficult to explain the number One in science. It is always much easier to explain the number Zero. But while reading The Ends of the World I came up with another possible explanation. How about starting with the number Zero and proceeding from that?
My Latest Explanation for Fermi's Paradox - the Null Result Hypothesis
What if the explanation to Fermi's Paradox is simply that the Milky Way galaxy has yet to produce a form of Technological Intelligence? By that, I mean that the galaxy has not yet produced a form of Intelligence that can make itself known across interstellar distances, including ourselves. Yes, we have been able to broadcast very weak radio waves for the past 100 years, but 100 light years is only about 0.1% of the distance across the galaxy and for all practical purposes could easily be rounded down to Zero. But since we have now found many Earth-like planets amongst the relatively small number of stars that we have examined, we now need some kind of kill mechanism that is 100% efficient at eliminating Technological Intelligences from all stellar systems. And while reading The Ends of the World, I came up with an idea. What if the conditions necessary to bring forth carbon-based Technological Intelligence on a planet or moon were also the kill mechanisms that eliminated all forms of carbon-based Technological Intelligences with 100% efficiency?
In order to proceed with the Null Result Hypothesis, we first need to list all of the factors that are necessary to bring forth a carbon-based Technological Intelligence. So the first thing we need to do is to generate some carbon-based life. In The Bootstrapping Algorithm of Carbon-Based Life, I covered Dave Deamer's and Bruce Damer's new Hot Spring Origins Hypothesis model for the origin of carbon-based life on the early Earth. In this model, you need water, carbon-based organic molecules, heat and a wetting-drying cycle on land above water. So in the Hot Spring Origins Hypothesis, you will not likely find carbon-based life on water worlds like Europa or Enceladus. In the Hot Spring Origins Hypothesis
model, if the Earth were totally covered by an ocean that was 100 miles deep there would be no carbon-based life on the Earth. For my purposes, water worlds provide a double whammy for carbon-based Technological Intelligences. Even if a water world were able to generate carbon-based life that was Intelligent, like the dolphins, the water-bound Intelligence would have a hard time becoming technological. In order to form a technological civilization, you need easy access to a form of energy, and that creates another bootstrapping problem for water worlds. That is because you cannot light a fire under water. Yes, it would be nice to skip using carbon-based fossil fuels to get technology off the ground and go directly to solar, wind or nuclear energy, but how could that ever happen without first lighting a fire? You cannot make the very first metals without lighting a fire, and it is very difficult to construct a solar panel, the copper windings in a windmill, or the core of a nuclear reactor without a source of metals. So the prerequisites for a carbon-based Technological Intelligence seem to be:
1. A terrestrial-type planet or moon that has some water.
2. A terrestrial-type planet or moon with some dry land.
3. A terrestrial-type planet or moon with an atmosphere containing some carbon dioxide as a source of carbon for photosynthesis.
4. A terrestrial-type planet or moon with a biosphere that has discovered photosynthesis. This is necessary to fuel a biosphere that has progressed beyond metabolizing the preexisting extant organic molecules found on the surface and to fix the carbon atoms found in carbon dioxide.
5. A terrestrial-type planet or moon with an atmosphere with enough oxygen generated by photosynthesis to fuel complex multicellular carbon-based life.
6. A terrestrial-type planet or moon with a carbon cycle that recycles carbon between the biosphere and the geosphere. This requires some kind of plate tectonics to generate subduction zones with volcanoes to pump carbon dioxide into the atmosphere and colliding plates to generate mountains that can then be weathered down to remove carbon dioxide from the atmosphere. These two carbon pumps work in combination with a biosphere that is constantly pulling carbon dioxide out of the atmosphere and depositing it in carbon-based fossil fuels and carbonate rock. Left to itself, a biosphere that is constantly pulling carbon dioxide out of the atmosphere with no way to replace its source of carbon is not an especially smart long-term strategy for a carbon-based biosphere to pursue.
7. A terrestrial-type planet or moon with an atmosphere with enough oxygen generated by photosynthesis to allow for the burning of carbon-based fuels. This is necessary to generate a civilization capable of producing metals.
8. A terrestrial-type planet or moon with a civilization that has discovered the Scientific Method and has generated technologies based upon scientific progress.
Now there should be no surprise that the above list of necessary conditions to bring forth a carbon-based Technological Intelligence is very similar to the current state of carbon-based life on the planet Earth. That is because we are just on the verge of becoming a true carbon-based Technological Intelligence ourselves as evidenced by the 100 light year sphere of radio waves that we have been able to generate so far. But the above list also contains the seeds of destruction that are found in my Null Result Hypothesis. The problem is that all of the above necessary conditions also mean that such a civilization would be able to begin messing with the carbon cycle of their home planet or moon. As The Ends of the World and Peter Ward's books point out, messing with a planet's carbon cycle can frequently lead to disaster. Now let's see why.
In This Message on Climate Change Was Brought to You by SOFTWARE, I explained that if you placed a sphere filled with air 100 miles above the Earth's surface and painted it gray so that 30% of the energy arriving from the Sun was reflected by the surface of the sphere, like the surface of the Earth does, then the temperature of the air within the sphere would be found to be 0 oF. Now the gray sphere and the Earth are both 93 million miles from the Sun, but the average temperature of the Earth is not 0 oF. Instead, it is more like 60 oF. That is quite a difference. Do you remember the movie Apollo 13? Recall that the astronauts were freezing their butts off on their perilous return home because they were forced to turn off most of their heat-generating electrical instruments. But the Apollo 13 spacecraft was in full sunlight all the way back. It should have been like lying on a nice hot beach in Miami during the summer. The reason it was not is that the Apollo 13 spacecraft had no surrounding atmosphere to hold in heat. The reason the Earth is about 60 oF warmer than it should be is primarily because the Earth's atmosphere contains carbon dioxide and water molecules, two of the necessary ingredients to bring forth carbon-based Intelligence on a planet or moon, and those molecules absorb and reradiate infrared photons. Figure 1 shows the actual spectrum of radiation emitted by the Earth as measured by satellites above the Earth's atmosphere. The red curve is the black body spectrum for an object with a temperature of 294 oK or 70 oF. The actual spectrum is a pretty good fit. The gap between the red curve and the actual spectrum represents the energy that is being trapped by the Earth's atmosphere. The bigger the gap area, the more energy is being trapped by the atmosphere. Notice that on both the left and right sides of the red curve that energy is being trapped by H2O water molecules. In the very center of the red curve, the energy is being trapped by CO2 carbon dioxide molecules.

Figure 1 - If the Earth were a perfect emitter it would emit infrared radiation back into space as depicted by the red black body spectrum above. It does not do so mainly because water, carbon dioxide and methane molecules absorb some of the upcoming infrared photons and then radiates them in all directions, with a 50% probability of emitting them back down towards the Earth.
If you look at the gap area between the red line in Figure 1 and what is actually emitted by the Earth, we see that water molecules are responsible for about as much energy absorption as carbon dioxide molecules. But that is not good news for our problem because that means there is a positive feedback mechanism involved. Warm air can hold much more water vapor than cold air can, so as carbon dioxide warms the Earth's atmosphere it means that the air can hold more water molecules that also warm the Earth's atmosphere. Over geological time, carbon dioxide is sort of the kindling wood that gets it all started. As the level of carbon dioxide rises in the atmosphere it increases the number of water molecules, and the two of them together make the air warmer and capable of holding even more water molecules to make the air even hotter. This is why the level of carbon dioxide in the Earth's atmosphere is so critical.

Figure 2 - The Earth's dry atmosphere consists of about 78% nitrogen molecules, 21% oxygen molecules and about 0.93% argon atoms. The trace gasses consist of carbon dioxide now at a level of 0.04%, with much smaller amounts of neon, helium, methane, krypton and hydrogen.
Conservatives may balk at the idea that an atmosphere with only 400 ppm of carbon dioxide (0.04%) could possibly be responsible for raising the average temperature of the earth by 60 oF. After all, carbon dioxide is just a trace gas in our atmosphere that currently stands at just 0.04% of our atmosphere. How can such a trace amount of carbon dioxide possibly be of consequence? Yes, the Earth's atmosphere does consist of about 78% nitrogen molecules, 21% oxygen molecules and about 0.93% argon atoms. But all of those molecules and atoms are completely transparent to both visible and infrared photons. So that means that 99.96% of the Earth's atmosphere plays no part in warming the Earth whatsoever. It's like those molecules and atoms are not even there. So it is really the small number of carbon dioxide and water molecules in the Earth's atmosphere that makes all the difference, and they necessarily have to be found in the atmospheres of all potential carbon-based Technological Intelligences.
Another potential kill mechanism, beyond excessive heating, that will always be present in the atmosphere of all potential carbon-based Technological Intelligences will be the fact that rising levels of carbon dioxide in the atmosphere will also acidify the oceans of their home planet or moon. As Peter Brannen explains in The Ends of the World and Peter Ward explains in his books, this might be an even stronger kill mechanism for excess levels of carbon dioxide than the extreme climate change it might bring on. For more on that see Triona McGrath's TED presentation:
How pollution is changing the ocean's chemistry
https://www.ted.com/talks/triona_mcgrath_how_pollution_is_changing_the_ocean_s_chemistry?utm_source=Science+worth+knowing&utm_campaign=d1897bbfd6-Science+worth+knowing_12-21-17_COPY_01&utm_medium=email&utm_term=0_83c20124eb-d1897bbfd6-297552313
The end result is that all emerging carbon-based Technological Intelligences will find themselves with the capability of causing their home planet or moon to quickly change to a climate having a daily high of 140 oF with purple oceans choked with hydrogen-sulfide producing bacteria, producing a dingy green sky over an atmosphere tainted with toxic levels of hydrogen sulfide gas and an oxygen level of only 12%, like the Earth had during the End-Permian greenhouse gas mass extinction 252 million years ago. Such a catastrophe might not cause the emerging carbon-based Intelligence to go extinct, but it most probably would put an end to its ability to make itself known to the rest of the Milky Way galaxy.
The Implications of the Null Result Hypothesis
If the Null Result Hypothesis is true, it means that the Milky Way galaxy has yet to produce a true form of Technological Intelligence that has made itself known to the rest of the galaxy because no civilization of carbon-based beings has yet been able to survive the limiting factors of carbon-based Intelligence. So is there no hope? This is where some softwarephysics can be of help. Again, the most consequential finding of softwarephysics is that it is all about self-replicating information. Currently, we are witnessing one of those very rare moments in time when a new form of self-replicating information, in the form of software, is coming to predominance. Software is now so ubiquitous that it now seems like the whole world is immersed in a Software Universe of our own making, surrounded by PCs, tablets, smartphones and the software now embedded in most of mankind's products.
Self-Replicating Information –
Information that persists through time by making copies of itself or by
enlisting the support of other things to ensure that copies of itself are made.
Over the past 4.56 billion years we have seen five waves
of self-replicating information sweep across the surface of the Earth and
totally rework the planet, as each new wave came to dominate the Earth:
1.
Self-replicating autocatalytic metabolic pathways of organic molecules
2.
RNA
3. DNA
4. Memes
5. Software
Software is currently the most
recent wave of self-replicating information to arrive upon the scene and is
rapidly becoming the dominant form of self-replicating information on the
planet. For more on the above see A Brief History of Self-Replicating Information.
The Characteristics of Self-Replicating Information
All forms of self-replicating information have some common characteristics:
1. All self-replicating information evolves over time through the
Darwinian processes of inheritance, innovation and natural selection, which endows
self-replicating information with one telling characteristic – the ability to
survive in a Universe dominated by the second law of thermodynamics and
nonlinearity.
2. All self-replicating information begins spontaneously
as a parasitic mutation that obtains energy, information and sometimes matter
from a host.
3. With time, the parasitic self-replicating information
takes on a symbiotic relationship with its host.
4. Eventually, the
self-replicating information becomes one with its host through the symbiotic
integration of the host and the self-replicating information.
5.
Ultimately, the self-replicating information replaces its host as the dominant
form of self-replicating information.
6. Most hosts are also forms of
self-replicating information.
7. All self-replicating information has to
be a little bit nasty in order to survive.
8. The defining
characteristic of self-replicating information is the ability of
self-replicating information to change the boundary conditions of its utility
phase space in new and unpredictable ways by means of exapting current functions
into new uses that change the size and shape of its particular utility phase
space. See Enablement
- the Definitive Characteristic of Living Things for more on this last
characteristic.
Currently, the memes are the dominant form of self-replicating information on the Earth. These memes are being replicated by the species Homo sapiens. Homo sapiens is a carbon-based DNA survival machine that runs on the old
metabolic pathways of organic molecules, RNA and DNA of yore, but also has a very large neural network that is capable of storing and replicating large numbers of self-replicating memes, including many scientific and technological memes. Thus, Homo sapiens is on the verge of becoming a carbon-based Technological Intelligence that is capable of making itself known to the entire Milky Way galaxy. But as we all know, these same factors that brought forth Homo sapiens in the first place have also allowed Homo sapiens to mess with the carbon cycle of the Earth. In Is Self-Replicating Information Inherently Self-Destructive? I commented upon Peter Ward's The Medea Hypothesis (2009). From Peter Ward’s point of view, all carbon-based living things resulting from Darwinian processes must necessarily be selected for the ability to self-replicate at all costs, with little consideration for their fellow beings sharing the resources of a planet, nor even for their own long-term survival. The urge to self-replicate at all costs necessarily leads to carbon-based living things that outstrip their resource base through positive feedback loops and that can only lead to disaster.
But surely all of the galactic forms of carbon-based Technological Intelligence that have ever come to be in our galaxy could not have been so stupid as to destroy themselves! Well, there is another factor. Don't forget that all carbon-based Technological Intelligences will come to be by means of the Darwinian processes of inheritance, innovation and natural selection at work. That necessarily means that there will always be a variation in the ability to do original scientific work within any given carbon-based population of creatures. And as we all know, it has only taken a very small percentage of the Earth's population to do the original scientific work that has already vastly transformed our planet. Unfortunately, the ability to exploit science-based technology will always be much more prevalent than the ability to understand the implications of science-based technology.
But as I also noted in The Dawn of Galactic ASI - Artificial Superintelligence, Homo sapiens is also in the process of creating a silicon-based Technological Intelligence in the form of a Galactic ASI. So the Earth is now in a tight race between carbon-based Intelligence destroying itself and silicon-based Intelligence taking off and exploring the Milky Way galaxy. If we can just hold it all together for another 100 years or so, the Earth might just be the very first planet in the Milky Way galaxy to do so.
Comments are welcome at scj333@sbcglobal.net
To see all posts on softwarephysics in reverse order go to:
https://softwarephysics.blogspot.com/
Regards,
Steve Johnston
Friday, November 30, 2018
SpaceEngine - the Very Finest Available in 3-D Astronomical Simulation Software
I personally love astronomical simulation software because I originally wanted to be an astrophysicist. When I was a teenager, I ground, polished and mounted the mirrors for several reflecting telescopes - with a 6-inch f/8, a 6-inch f/4 and an 8-inch f/6 mirror. The astronomy club I belonged to also built a homemade 12.5-inch f/8 reflector too with an equatorial mount. The very first astronomical simulation software that I installed on a PC was Redshift 1.0 back in 1995. Since then, I have upgraded to Redshift 7.0, and every few years I have searched for more software that might surpass it.
Update 06/19/2019 - SpaceEngine 0.990 went on sale on Steam on 06/11/2019 to Very Positive reviews for only $24.99. To see the reaction of the SpaceEngine community of end-users to the new SpaceEngine 0.990 release take a look at the SpaceEngine Reddit community at:
https://www.reddit.com/r/spaceengine/
SpaceEngine 0.990 is available at:
https://store.steampowered.com/app/314650/SpaceEngine/
SpaceEngine 0.9.8.0 beta is still available for free at:
http://spaceengine.org/
and will remain so. SpaceEngine 0.9.8.0 beta is a great introduction to the commercially available SpaceEngine 0.990, and I would advise any of you who are hesitant about purchasing SpaceEngine 0.990 to try the free SpaceEngine 0.9.8.0 beta version out first. The remainder of this post only discusses SpaceEngine 0.9.8.0 beta and contains a very helpful tutorial to quickly get you started with SpaceEngine 0.9.8.0 beta. This SpaceEngine 0.9.8.0 beta tutorial would also be quite helpful with mastering SpaceEngine 0.990. Be sure that your machine meets the Minimum Requirements for SpaceEngine 0.990 before you purchase it! Below is the remainder of my original post on SpaceEngine.
In this posting, I would like to showcase some remarkable software created by the Russian astronomer and programmer Vladimir Romanyuk called SpaceEngine. SpaceEngine is written in C++ and Vladimir Romanyuk coded about 99% of the software himself. If you have been following this blog on softwarephysics, you know that I tend to be a bit verbose. But in this instance, for the very first time, I find myself nearly speechless when it comes to describing the SpaceEngine software. SpaceEngine is truly the finest piece of software that I have ever seen, and I am now totally addicted to using it to dynamically explore the Universe. SpaceEngine is not only visually beautiful, but it is also intellectually beautiful! The SpaceEngine software simulation dramatically displays in software the culmination of over 400 years of scientific achievement. In SETS - The Search For Extraterrestrial Software I commented that if we ever were to receive a broadcast of alien software, that we would find ourselves hard-pressed not to try it out. As it stands, if we only had the necessary technology, I would propose that SpaceEngine be the very first software that we broadcast out to the cosmos, as a proud example of the best that we have been able to achieve in scientific software. Not only does the SpaceEngine software best portray the best of what we are, it also explains where we came from, and it also best describes our current understanding of the Universe.
In this modern day and age, there most certainly should be a Nobel Prize for scientific software, especially for scientific simulation software. The tremendous scientific value that has been gained over the past 77 years from scientific simulation software, ever since Konrad Zuse first cranked up his Z3 computer in May of 1941, can hardly be overstated. Scientific simulation software is truly the unsung hero of all the sciences, and it, therefore, justly deserves a Nobel Prize of its very own at each and every Nobel Prize award ceremony. In that regard, I personally now would like to nominate Russian astronomer and programmer Vladimir Romanyuk, the author of SpaceEngine, to be the very first person to receive the Nobel Prize for scientific software. Since astronomy is the mother of all the sciences, it only seems fitting that astronomical simulation software should be awarded the very first Nobel Prize in scientific software. After all, the SpaceEngine software beautifully explains all of the fascinating and profoundly strange motions of the lights in the night sky that baffled mankind for so long and finally got the Scientific Revolution off to a start.
Since I cannot do justice to SpaceEngine with screenshots, please now go to Google Images and do a search for SpaceEngine to see a huge number of screenshots that show what SpaceEngine can do. There are also a few nice videos of SpaceEngine on YouTube that you should watch too. But videos and screenshots alone just cannot convey the delight of trying out the software for yourself. So go to the SpaceEngine homepage to download your own free copy of SpaceEngine 0.9.8.0 beta at:
http://spaceengine.org/
The Scientific Value of Astronomical Simulation Software
Pure homegrown astronomical software has been used by many research organizations for many decades to store and analyze real astronomical observations. Similarly, other organizations have come up with 3-D astronomical simulation software that allows users to interactively experiment with astronomical data. 3-D astronomical simulation software allows users to overcome the two main difficulties that humans have with understanding the real Universe. The first problem is that humans only live for 100 years or less. The second problem is that the speed of light is just too darn slow for the vast size of our Universe. Good 3-D astronomical simulation software allows users to speed up time by a factor of many millions and also allows users to travel many hundreds of millions of times faster than the speed of light too. The good news is that in recent years we have begun to see both of these software efforts come together. For example, in The Spectacular and Free Software of the WorldWide Telescope - WWT I commented that the great scientific value of the WWT was that it provided a public software platform for researchers to publish and share real astronomical observations with the general public. The WWT also has an excellent astronomical simulator called the 3D-Solar System that will let you fly around the Solar System and through the Milky Way galaxy and to external galaxies as well. I have also been playing around with the Hayden Planetarium's Digital Universe that runs on the old Partiview software (2002) from the University of Illinois. Partiview is a bit DOS-like in nature because you really need to use its extensive command line interface to get the most out of it, and if you did not have a DOS PC back in the 1980s, you might have some trouble with learning it. I put together a list of Partiview commands on a spreadsheet that allows me to quickly copy/paste Partiview commands into the command line textbox. I will probably come out with a future posting on the Digital Universe and Partivew. The one outstanding feature of the Digital Universe is that you can speed up time and watch the proper motions of the nearby stars unfold in real time. You can download the free Digital Universe and Partiview software at:
https://www.amnh.org/our-research/hayden-planetarium/hayden-planetarium-promos/download-files
I would recommend downloading the Digital Universe + Partiview Resources distribution.
Gaia Sky is also a nice Java application that lets you navigate around the Solar System, Milky Way galaxy, and some nearby galaxies. The key features of Gaia Sky are that it offers the 3-D locations and proper motions of up to one billion stars within the Milky Way as determined by the 5-year Gaia mission. However, I did run into some memory issues because I only have 4 GB of memory on my current machine. I was just barely able to load the DR2-Default catalog of stars, consisting of 7.5 million stars, and the NBG and SDSS DR12 catalogs of galaxies into memory and still run Gaia Sky.
Of course, I gave Celestia a try many years ago as well. It has a good 3-D astronomical simulator, and I believe that it might have been one of the inspirations for SpaceEngine, but SpaceEngine now far surpasses it. Stellarium is not a 3-D astronomical simulator, but it does an excellent job of simulating the observable night sky for amateur observers. Stellarium will also let you simulate the night sky from many other objects in our Solar System, such as from any location on any of its planets or moons. Stellarium is also an excellent tool for teaching classical positional astronomy at both the high school and college levels. A very good teaching strategy would be to use Stellarium first for teaching ground-based classical positional astronomy and then allow students to fly out into the Solar System, the Milky Way, and other galaxies with SpaceEngine to explore those objects in a 3-D simulation. I also tried the free OpenSpace software, but I just could not get it to work. It would print out a very lengthy log of debug statements in a DOS window and then just hang. I could tell that it was dead because it flatlined in Task Manager.
So Where are the University Astronomy Departments?
Since SpaceEngine is by far the very best available 3-D astronomical simulation software in existence, I was expecting to find that many university astronomical departments would be strong supporters of the effort and using SpaceEngine for teaching and research purposes. But based on my Internet searches, SpaceEngine seems to be a grass-roots effort solely directed by Vladimir Romanyuk that has been mainly funded by donations from a following of SpaceEngine affectionados. By the way, there is a link on the SpaceEngine homepage that allows grateful end-users to donate to the cause. The SpaceEngine user community seems to essentially consist of individuals interested in astronomy and individuals interested in gaming, without any financial support from academia or governmental agencies. In fact, Vladimir Romanyuk intends to eventually make SpaceEngine a commercial product sold through the Steam gaming website at:
https://store.steampowered.com/
For a good introduction to SpaceEngine 0.9.9.0 beta watch the YouTube videos at:
https://www.youtube.com/watch?v=9XRBMyPqP7A
https://www.youtube.com/watch?v=Q8V1hZ6Q_X8&feature=youtu.be
The next release of SpaceEngine, SpaceEngine 0.9.9.0, will be distributed via Steam for a small price instead of the SpaceEngine website. Naturally, a university would have to purchase a commercial license for SpaceEngine 0.9.9.0 and then perhaps charge students a usage fee. In the first YouTube video above, it was stated that the intention is to keep SpaceEngine 0.9.8.0 beta on the SpaceEngine website for free as an introduction to SpaceEngine 0.9.9.0. The remainder of this posting will only be discussing the capabilities of the free SpaceEngine 0.9.8.0 beta release.
Now the baffling question I have is where are all of the university astronomy departments? Based on my Internet searches, university astronomy departments do seem to be using some of the astronomical simulation software mentioned above, but not the far superior SpaceEngine simulator. The first public release of SpaceEngine came out in June 2010, and SpaceEngine 0.9.8.0 beta was released in 2016, with SpaceEngine 0.9.9.0 beta currently undergoing final testing. So there has been plenty of time for the university astronomy departments to catch wind of SpaceEngine. In my opinion, every university astronomy department in the world should be using SpaceEngine to teach astronomy courses and to inspire the research of its graduate students and professors. I cannot think of a more exciting and rewarding way to teach astronomy and inspire researchers and young people than to let them wander through the simulated Universe of SpaceEngine.
SpaceEngine brings back the excitement I experienced as a child watching the dawn of the Space Age unfold before me and getting me excited about the sciences. I am now using SpaceEngine today to bring that sense of adventure and excitement to my grandchildren with the hope that it will shape their lives as well.
So my fear is that the astronomical research community has not been taking SpaceEngine seriously as a very sophisticated scientific tool. Not only is SpaceEngine a very useful tool for teaching newcomers the mysteries of astronomy and an aid to bring young people into the field of astronomy and astrophysics, but it is also a beautiful tribute to the 18th century Enlightenment values of evidence-based rational thought. For some, SpaceEngine may merely be a game that helps the average person who is lost in space and time to finally realize where the heck they are, but in reality, SpaceEngine is a very valuable scientific tool. At the very least, there is nothing so therapeutic for the psyche as spending a peaceful hour gliding through the Universe on SpaceEngine. If we could only have all the members of the United Nations spend a few hours with SpaceEngine each week, it would be a far better world.
In addition to getting young people excited about the sciences, SpaceEngine could be of significant scientific value to graduate students and principal investigators in modeling stellar exoplanet systems. SpaceEngine allows end users to model such systems by creating them with simple script files that describe the stellar system of stars and planets. SpaceEngine then renders such systems in beautiful detail. By exploring the machine-generated stellar systems that SpaceEngine automatically generates on its own, researchers can also be inspired into exploring models that they never even thought of.
The Machine-Generated Universe of SpaceEngine
The first thing to realize about SpaceEngine is that it simulates a Universe in software that goes far beyond that portion of the Universe that is currently within our cosmic horizon. The SpaceEngine Universe does contain all of the planets in our Solar System and their moons, as well as a large number of asteroids and comets. It also contains all of the stars in the Hipparcos catalog and all of the galaxies in the NGC/IC catalogs too. However, it contains much more than that. SpaceEngine generates a huge number of synthetic machine-generated galaxies, star clusters, nebulae, stars, planets, moons, asteroids, comets, and terrains within a cube that is 10 gigaparsecs (32.6 billion light years) on a side. Vladimir Romanyuk calls such synthetic machine-generated objects "procedural" objects because they are generated by machine algorithms that use our current understanding of astrophysics and astronomical statistics. These procedural algorithms use machine-generated random numbers and fractal noise in a Monte Carlo manner to give each machine-generated procedural object a bit of individuality. The small part of the real Universe that we have observed so far lies within this vast machine-generated procedural Universe. Now if you want to limit SpaceEngine to only display real astronomical bodies that we have already observed, you can easily do that by clicking on a few checkboxes that quickly turn off the procedural objects. But let's say you would like to use SpaceEngine to take you to M31, the beautiful spiral galaxy in Andromeda. Once you get to M31 with SpaceEngine and start to enter the galaxy it is nice to see the stars of M31 fly by as you travel deeper into the galaxy. Since we have only observed the very brightest of stars in M31 that would be impossible to do using actual observed data. But SpaceEngine can achieve this by machine-generating synthetic star systems within M31 using computer algorithms that are based upon the astrophysics and the statistics we have gathered from our Milky Way galaxy to generate scientifically feasible astronomical objects that can be explored with SpaceEngine. All of the machine-generated astronomical objects begin with the letter "R". For example, SpaceEngine has:
1. RG objects - Machine-generated galaxies
2. RC objects - Machine-generated star clusters
3. RN objects - Machine-generated nebulae
4. RS objects - Machine-generated stars
Surrounding the machine-generated stars are machine-generated planets, dwarf planets, moons dwarf moons, asteroids and comets. For example, let's take a trip to M31, the famous galaxy in Andromeda. As we enter the galaxy at a speed of about 100 light years per second, we begin to see a huge number of stars from M31 fly past us. But in reality, M31 is about 2.5 million light years away from us, and we can only resolve the very brightest of its stars back here on the Earth. So the stars that we see fly by once we enter M31 are really machine-generated stars that have names that begin with an "RS" name like RS 1228-3145-7-1995390-283. Then we can go to machine-generated planet #3 of star RS 1228-3145-7-1995390-283 and then to its third moon which happens to be a captured asteroid like Demos and Phobos, the moons of Mars. Below we see some information exported from SpaceEngine for RS 1228-3145-7-1995390-283 3.D3:
Place "Dwarf moon Warm asteroid"
{
Ver 980
Body "RS 1228-3145-7-1995390-283 3.D3"
Parent "RS 1228-3145-7-1995390-283 3"
Date "2018.12.30 17:27:10.25"
Pos (+000000000001A534B7198E2D6BEEF18B +000000000007EBCB2361F051331AE5B9 +000000000008DA9B63AE73A3E38979CC)
Rot (0.3888462302642747 0.03506029275187311 -0.6700459646023379 -0.6313539343359937)
Vel 4.5861677e-014
Mode 1
}
I can then add RS 1228-3145-7-1995390-283 3.D3 to a database of Locations within SpaceEngine so that I can return to it later with a single click. Another way to return to the object in the future is to press the ~ key on your PC. A command window will pop up in SpaceEngine and you can then paste in the command GoTo RS 1228-3145-7-1995390-283 3.D3 to get to that procedural object in M31. You could also email a friend to take a look at RS 1228-3145-7-1995390-283 3.D3 as well, and your friend could get to the same object with that command.

Figure 1 – Dwarf moon RS 1228-3145-7-1995390-283 3.D3 in the foreground with its home planet RS 1228-3145-7-1995390-283 3 in the background. The star RS 1228-3145-7-1995390-283 cannot be seen in this view, but it is a star in the Andromeda galaxy M31. The plane of M31 can be seen just to the left of the dwarf moon as a "milky way" of the galaxy. All of the stars in the background are also machine-generated procedural stars of M31.
Getting Started with SpaceEngine 0.9.8.0 Beta
I am still a relative novice user of SpaceEngine, and I am still learning new things about it each day. However, I do have the benefit of recently climbing the initial learning curve for SpaceEngine fresh in my mind, so I would now like to briefly explain a few things about SpaceEngine to help you up that initial learning curve too. When you first crank up SpaceEngine 0.9.8.0 beta, click on the Planetarium link. You will then see the main screen of SpaceEngine as shown below.

Figure 2 - The main screen of SpaceEngine displays information about the "currently selected object" in the upper left and four toolbars of icons along its perimeter.
The main screen of SpaceEngine displays information about the "currently selected object" in the upper left and four toolbars of icons along its perimeter. The icon toolbars are pinned to the main window and are very useful for beginners. However, after you get a bit used to SpaceEngine I would recommend that you unpin the toolbars and use keyboard shortcuts instead. You can always quickly bring up the icon toolbars by moving your mouse to where they should be displayed on the main window. All of the keyboard shortcuts are listed in C:\SpaceEngine\docs\readme_eng.txt. You can press Ctrl-Enter to toggle between a full-screen display of SpaceEngine and a windowed display of SpaceEngine. The first thing you should do is click on the detective magnifying glass icon on the left-hand toolbar. This will bring up the Find object search box.

Figure 3 - Locate the Earth with the Find object dialog box.
Type in "earth" and then find the Earth in the table listing. Then click on the Go to button. SpaceEngine should then take you to a view similar to Figure 2 above. The screen information text will show that the Earth is the currently selected object and the lower-left toolbar will tell you that you are Following Earth.
Rotating Your Camera
First, make sure the NumLock for your numeric keypad is turned on. Just go to WordPad and press the 4 key on the numeric keypad. You should see the number 4 on your screen. Now press the 1 key at the top of your keyboard. That puts your camera in Free mode. Now press the right arrow key on the numeric keypad. That rotates the direction that your camera is looking at to the right. Because your camera is now looking a bit to the right, the Earth seems to move to the left. Now press the c key to recenter the selected object - the Earth. Now try doing the same with the left arrow, up arrow and the down arrow keys on the numeric keypad. You should see the Earth make corresponding motions as your camera rotates. Next, try doing all of this with your left mouse button instead of the numeric pad arrow keys. With your left mouse button depressed you can rotate your camera in all directions, but it will be a little more jerky than when you use the numeric keypad arrow keys. Now press the 2 key at the top of your keyboard. That puts you in Spacecraft mode. Then try rotating your camera with the numeric keypad arrows and your left mouse button. What you will notice is that in Spacecraft mode your camera has rotational inertia, meaning that once you get it rotating, it keeps rotating all by itself. In fact, if you repeatedly push a numeric keypad arrow key, or keep it depressed, the camera will begin rotating faster and faster until you begin to get dizzy. To halt the camera rotation press the x key. To recenter your selected object press the c key. Now press the 3 key at the top of your keyboard. That puts your camera in Aircraft mode. If you repeat all of these camera exercises, you will see that Aircraft mode is just like Spacecraft mode because they both give the camera rotations inertia. I will discuss the differences between Spacecraft mode and Aircraft mode when we start to move the camera through space. Now try pressing the 7 and 8 keys on your numeric keypad. Notice that those keys rotate the camera about its optical axis and that the 1, 2, 3, x and c keys all keep the same behaviors as they did before. That is all you need to know about rotating your camera.
Orbiting Your Camera
Now let's start moving your camera. The first thing you should do is get back into Free mode by pressing the 1 key. Now depress your right mouse button and start moving your mouse around. What you are seeing is that your camera remains at the same distance from the selected object, the Earth, but that you are quickly moving your camera all around the Earth while you look down at it. If you now press the 2 or 3 key to get into the Spacecraft mode or Aircraft mode, you will notice that your camera now has orbital inertia. So long as you keep the right mouse button depressed, you will orbit around the selected object. You can even just depress the right mouse button without moving the mouse. Then press the numeric keypad arrow keys to change the camera orbit or increase the speed of its orbit. Now use one of your numeric keypad arrow keys to move the Earth a bit to one side so that you are no longer looking straight down at it. Then start orbiting the Earth again. That's nice when you want to orbit the Earth or another body and make it look like you are doing so from a real satellite.
Moving Your Camera Through Space
Now let's start moving the camera through space. First, go to the toolbar on the right side of the SpaceEngine screen and make sure you have the Velocity vector enabled. It's the icon that has a circle with a dot at its center. Now press the 1 key to get back into Free mode. Check the max velocity setting on the lower-left toolbar. Use the up and down arrows to set your max velocity to 100.00 km/sec. Now press the up arrow key on your main keyboard. In the center you will see a circle with a dot in it and that your velocity quickly accelerated from 0 - 100.00 km/sec and then stayed at 100.00 km/sec for as long as you held down the up arrow key. When you stop pressing the up arrow key, your camera quickly deaccelerated from 100.00 km/sec back down to zero and you stopped moving through space. Now press the 2 key to get into Spacecraft mode. Notice that on the lower-left toolbar that your max velocity changed to a max acceleration of 10.00 km/sec2. Now when you press the up arrow key your camera starts to accelerate towards the Earth and gets up to a max acceleration of 10.00 km/sec2. But your camera velocity keeps increasing because of the acceleration. You can accelerate up to a very high velocity by just keeping the up arrow key depressed. Notice that in Spacecraft mode that your camera, once again, has inertia. When you stop pressing the up arrow key, you stop accelerating towards the Earth, but you maintain whatever velocity that you had going. Notice that the distance of your camera from the Earth keeps decreasing on the SpaceEngine selected object display. If you keep this up, eventually you will crash land on the Earth, so press the z key to stop your motion. Now press the down arrow key on your keyboard to accelerate away from the Earth. Notice that SpaceEngine uses the same "arrow" convention that physics uses for magnetic fields to display whether you are moving towards an object or away from an object. To quickly increase or decrease the max acceleration, press Ctrl + or Ctrl -. If your mouse has a mouse wheel, you can also quickly increase or decrease the max acceleration using Ctrl-mouse wheel. Once you have increased or decreased the max acceleration, then press the up arrow or down arrow keys on your main keyboard to use the new values in accelerating towards or away from the selected object. Naturally, when you increase the acceleration of the camera, you can quickly crank up some very high velocities. In fact, SpaceEngine will let you crank up your acceleration to 100 million light years/sec2! That means that if you hold down your keyboard arrow keys for a number of seconds, you can find yourself flying through the Universe at a velocity of over a billion light years per second. That will quickly put you passed our current cosmic horizon and into the purely machine-generated procedural Universe of SpaceEngine. Astrophysics tells us that all of those machine-generated procedural galaxies, stars, planets, moons, asteroids and comets are really out there passed our current cosmic horizon, but that we just cannot see them today, and most likely, we never will!
Now let's look at the difference between the Aircraft mode and the Spacecraft mode when you are moving under power. Both modes use acceleration to gain velocity when you press the keyboard arrow keys and both have inertia, so once you get going you keep going, even when you stop pressing the keyboard arrow keys. The difference is the direction you go. The best way to demonstrate that is to land on a body.
Landing on an Astronomical Body and Moving Around its Surface
Press the c key to recenter the Earth on your screen. Then press the 1 key to get into
Free mode. Now use your right mouse button to position your camera so that you are looking straight down on your hometown. Your hometown should be directly in the center of your screen. Make sure that the Atmosphere, Clouds and Water icons are enabled on your right-hand toolbar to give more reality to your simulation. Then click on the Land on object icon on the lower left toolbar. The Land on object icon displays an arrow pointing to a landing location. SpaceEngine will then take you down to the surface of the Earth and put you 1 meter above the surface of the Earth at a location pretty close to your hometown. Take a look at the displayed latitude and longitude. Your camera will also be looking at the horizon. To land closer to an exact spot you can use a command line command. First press the ~ key to bring up the SpaceEngine command line console. Then use Ctrl-v to paste in the latitude and then the longitude of your hometown and a 0.1 too. For example, my hometown of Roselle, Illinois in the United States is at LandTo 41.9 -88.1 0.1. After you paste in the command press Enter. That will take you several kilometers above the desired latitude and longitude. I am not sure what the third parameter does. To point your camera at the horizon press the End key. To get down to 1 meter above your desired latitude and longitude, just press the Land on object icon. Now take a look around. Press the left or right arrow keys on the numeric keypad to scan the horizon a bit. Press the 2 key to get into Spacecraft mode to give your camera some inertia. Now with a few taps of the left or right arrow keys you can scan the whole horizon. Use the x key to stop the camera rotation. You can use the numeric keypad up and down arrows to look up in the sky or down to the Earth. Press the End key to point your camera at the horizon and 1 to go back to Free mode. Change your max velocity to 1.00 m/sec on the lower left toolbar. Now press the up, down, left and right arrow keys on your main keyboard. Notice that you move horizontally over the surface of the Earth in different directions keeping an altitude of 1 meter at all times. Now press 2 to go into Spacecraft mode and use the arrow keys on your main keyboard to get moving in some direction. Once you get going, press the numeric keypad left and right arrows to look to the left and right of where you are driving. It should look just like you are turning your head while driving a car. The car keeps going in the same direction, but you can look in different directions as the scenery rolls by. Again use the x key to stop the rotation of the camera. You can also use the numeric keypad up and down arrows to look up and down in the sky as you drive by. In all cases, your velocity remains constant as the camera continues to move along over the Earth. Press the z key to stop moving. Click on the Land on object icon again to get your camera 1 meter above the ground and looking at the horizon. Now press the 3 key to get into Aircraft mode. Set your max acceleration to 1.00 m/sec2 on the lower left toolbar. Tap on the up arrow on your main keyboard to start moving forward and slowly gain some speed. Once you get up to about 4 - 5 m/sec, gently tap on the up arrow key on your numeric keypad and you will begin to lift off from the ground and start flying! Press the up arrow key on your numeric keypad a little to increase your rate of climb. Then press the x key to stop your camera from continuing to rotate upwards. You will still be climbing, but the rate of climb will now be steady. To level off and fly at the same altitude press the End key to get your camera to point to the horizon. So that is the difference between the Spacecraft mode and Aircraft mode. In the Spacecraft mode, you travel with whatever velocity vector you have set and you are free to rotate your camera with the numeric keypad arrow keys. In Aircraft mode, your camera moves in the direction that the camera is looking at. Now to fly up to outer space like a spaceplane, just boost up your max acceleration to 10.00 km/sec2. Then aim your camera up slightly with the up arrow on your numeric keyboard. Then give the up arrow on your main keyboard a few taps to rapidly gain some velocity. You will soon be heading out to space. Now press the 2 key to go into Spacecraft mode. Now you can use the arrow keys on the numeric keyboard to look around the Earth as you continue to rise above the Earth along the velocity vector that you have just set. Now you can really fly your camera around the Earth. Go back into Aircraft mode and use the numeric keyboard keys to change the direction in which you are going and then flip back to Spacecraft mode to watch the world go by. Again, make sure you have the Atmosphere, Clouds and Water icons turned on the right-hand toolbar to make things look more realistic. Another way to leave a planet is to press the 2 key to get into Spacecraft mode. Then press the c key to center the planet. This will have the camera looking straight down at your feet. Now press the down arrow key on your main keyboard to lift off from the planet. Then press Ctrl + a few times to increase your max acceleration. Now press the down arrow on your main keyboard again to boost your velocity. Press the End key to point your camera at the horizon. Now you can use the arrow keys on your numeric keypad to look around as you rise from the planet surface. This is fun to do over the open ocean of the Earth.

Figure 4 – When taking off from the open ocean, at first you see sunlight glinting off the waves.

Figure 5 – As you start to climb above the clouds, the sky becomes a deep blue.

Figure 6 – When you rise above the Earth's atmosphere you begin to see the stars.

Figure 7 – This is nice to do at sunset as well. The section below will explain how you can speed up time and track the Sun to get a sunset view.
Another way to achieve a liftoff from an astronomical body is to first land on the object. After you have moved around its surface for a while, press the End key to point the camera at the horizon. Then press the 1 key on your numeric keypad. That will move your camera "up" relative to what your camera is looking at. Since you are looking at the horizon, you will see your camera liftoff from the object. Press Ctrl + a few times or use you Ctrl-mouse wheel to increase your max acceleration. Now press 2 to go into Spacecraft mode and use the arrow keys on your numeric keypad to look around as you rise from the object. You can also use the 0 key on your numeric keypad to move the camera "down" relative to what your camera is looking at too. "Up" and "down" are defined as "up" and "down" relative to the top and bottom of your computer screen.
On the left-hand toolbar click the cogwheel to bring up the graphics dialog box. Click on the Diffraction Spikes checkbox and set the Diffraction Spikes Size to about 0.15. That will give the Sun and other close by stars some nice diffraction spikes. If you want, you can also play with adding Lens flares too. That will simulate light bouncing around within the optical train of the camera, producing unwanted reflections. As an old-time reflecting telescope builder, I like to add a little diffraction, but I certainly do not like adding the optical train aberrations that I always tried to eliminate!
Following, Rotating With and Tracking Astronomical Bodies
Now that we know how to navigate our SpaceEngine camera and how to land on an astronomical body and move around on it, the next thing we have to learn about is reference frames. After all, the seemingly strange motions of objects in the night sky only seemed strange because people did not understand the importance of reference frames. The first thing to do is to pin the bottom left-hand toolbar to the main viewing screen so that you can always see it. On that toolbar, just to the right of your current velocity and acceleration values, you will find your current reference frame. For example, use the Find object dialog box to GoTo the Earth. You should now see a reference frame of Following Earth on the lower left-hand toolbar. Now speed up time by pressing the l key several times. You will begin to see the Earth spin below you because you are following the Earth's center. Press the k key to slow down time. Press the j key to reverse time. Press the spacebar key to stop time. Press the \ key to return to the normal passage of time. Press the Ctrl \ keys to return time to the clock time on your PC. You can also do all of this with the time icons on the lower left-hand toolbar of SpaceEngine. As you change the speed of time you will notice that the Earth remains standing still in the frame and that none of the background stars are moving either. That is because you are following the Earth's center as it orbits the Sun. You only see the Earth spinning because the stars are so far away that the bouncing back and forth of the stars because of parallax is too small to see. Now press Shift-r to change your reference frame to Rotating Earth. Then speed up time with the l key. Now the Earth remains centered in your field but it does not spin. You see the night and day pass over the surface of the Earth and you see the background stars slip by. All of this is because the Rotating Earth reference frame has you spinning with the Earth like a geosynchronous satellite. Your camera is orbiting the Earth at the same speed that the Earth is turning so you always see the same spot on the Earth. Now press Shift-d. That will detach your camera from all moving astronomical objects. You will now be floating unattached at a point in space that is not in motion relative to the Sun. Now press the t key. That will have you tracking the currently selected object - the Earth. Now speed up time and watch the Earth move past you along its orbit. You can use the j key to reverse time and see it all over again. The t key toggles tracking on and off. When you are tracking an astronomical object, the object always stays in the middle of your field, no matter what else is going on. So you can do things like track the Moon or the planet Mars while in a Rotating Earth or Following Earth reference frame. This can all be further clarified by clicking on the cogwheel on the right-hand toolbar and enabling orbits for planets. Now navigate so that you are very far from the Earth and the Sun. Then try out the different reference frames while speeding up time. You can also use your right mouse button to orbit your camera all over the place while this is all going on.
Observing Astronomical Bodies With the Camera Zoom Lens
Now that we are above the Earth's atmosphere, let's do some observing. Click on the detective's magnifying glass on the left-hand toolbar to bring up the Find object dialog box. Then type in "Saturn". Select Saturn from the list and press the OK button. That will make Saturn the currently selected object as displayed in the SpaceEngine information text on your screen. If you look at the lower left-hand toolbar, you will see that you are currently Rotating Earth because you had previously landed on the Earth and then you lifted off from it. Now press the c key to center Saturn in your field. To observe Saturn more closely use the telescopic zoom on your camera by holding down the Shift key and your left mouse button at the same time. Then move your mouse forward and backward to adjust the zoom. You will then see Saturn and all of the background stars drifting by as you would see in a telescope. If you press the t key you will notice that the drifting stops because you are now "tracking" Saturn from a Rotating Earth. When you "track" an object, SpaceEngine keeps the object in the center of your field, like the clock drive on a telescope with an equatorial mounting. To remove the tracking, just press the t key again.
Now if any of this extreme zooming causes SpaceEngine to freeze up, you are probably exceeding the capabilities of your machine. I always buy cheap PCs. For example, I am currently using a year-old $250 HP laptop with a 15.6" screen, 4 GB of memory, a 2.5 GHz processor and an inexpensive graphics card that has 80 MB of dedicated memory and shares 4 GB of main memory with my CPU. That's all I need to do email, surf the Internet, and stream videos for online courses, YouTube lectures and HD Netflix. This machine is a little below SpaceEngine minimum standards, but for the most part, SpaceEngine runs just fine for me if I exercise a little bit of care in how I use it. This is nothing new for me. I have been trying to squeeze more and more software into a limited amount of hardware for practically my whole life. When I first started programming FORTRAN back in 1972, I was feeding punch cards to an IBM OS/360 MFT (Multiprocessing Fixed Task) mainframe with about 1 MB of memory and a clock speed of 750 KHz. That 1 MB of memory was divided up into a max of 5 fixed regions of memory like - 128 KB, 128 KB, 256 KB, 256 KB, and 256 KB so that the machine could process 5 batch jobs at the same time. So my "really big" programs had to fit into 256 KB of memory. Now my current machine may be a little below SpaceEngine standards, but I usually only have problems with extreme zooming. I always keep Task Manager running in detail mode so that I can see what is going on when my machine gets slow. When I do an extreme zoom in SpaceEngine, the GPU steals a bunch of memory from the CPU and the CPU then starts paging out memory to disk. I see the GPU go to 90%, CPU go to 90% and disk go to 100% on Task Manager as the CPU tries to write out a huge memory swap file to disk. If I catch this in time, I can do an "End task" on the SpaceEngine PID in Task Manager to kill the process, just like I used to do at work on production Unix servers when things really got bad on an outage call. Then I watch Task Manager for several minutes to watch the machine recover. Disk will stay at 100% for a few minutes and then rapidly decline. Then I can use the machine again. However, whenever you kill a process on a machine there is always the danger that the process was trying to do something important when you killed it. I noticed that one time after I killed the SpaceEngine PID that SpaceEngine could not find things in the Find object dialog box. So killing the SpaceEngine PID must have corrupted a file that was being written to when I killed the SpaceEngine process. To fix the problem, I just deleted the C:\SpaceEngine folder and then reinstalled SpaceEngine with the SE-0980-setup.exe install program. That only takes a few minutes. I am keeping a copy of the SE-0980-setup.exe install program in case I need it again in the future. Since then, I have found an easier way to fix nearly all SpaceEngine crashes. Simply keep a backup copy of the entire current C:\SpaceEngine\config folder someplace on your C: drive, like on C:\Temp\SpaceEngineBackup\configB1. Then, after each time you leave SpaceEngine, after making some interesting updates to your Journey log or Locations that you would like to keep, make a new backup copy like C:\Temp\SpaceEngineBackup\configB2. Then, if you ever have problems with bringing SpaceEngine back up again, just copy your most recent backup folder to C:\SpaceEngine\config.
So this is nothing new for me. I have spent the past 47 years as an exploration geophysicist and an IT professional trying to squeeze more and more software into the available hardware. And that is a good thing. After all, it has always been the relentless demands of software for more and more memory and CPU-cycles over the years that really drove the exponential explosion of hardware capability. For more on that please see Some Thoughts on the Origin of Softwarephysics and Its Application Beyond IT. The fix for me is to simply not to do extreme zooming in SpaceEngine. Instead, I just fly to Saturn and take a look at it closer up. I do not have a problem with reasonable zooming with SpaceEngine. Otherwise, SpaceEngine runs just fine on my "very underpowered" machine.

Figure 8 – SpaceEngine autopilot can quickly take you to Saturn for a closer look. Once there, use your right mouse button to orbit Saturn and view it from many directions.
Traveling to Distant Astronomical Objects
You should now be in the vicinity of the Earth, if not, GoTo the Earth. Now enter "Saturn" into the Find object textbox and press Enter to make Saturn the currently selected object as displayed in the SpaceEngine information text on your screen. Then press the c key to center Saturn. Press the 1 key to get into Free mode and set your max velocity to 1.0 AU/sec on the lower left toolbar. Now press the up arrow key on your main keyboard to move closer to Saturn in spurts. Most likely, you will overshoot Saturn, but not to worry. Just lower your velocity with Ctrl - and then use the down arrow key on your main keyboard to back up. Eventually, you will now see a nice view of Saturn. Press the Shift f key so that you are now following Saturn. You can now use your right mouse button to orbit all over Saturn and look at it from any direction. I find that I can now zoom in and out with my Shift left mouse button on my "underpowered PC" without a problem. To get back to a magnification of 1.0 x press the Home key. That is the hard way to get to Saturn. The easy way to get to Saturn is to use the SpaceEngine autopilot. Just make Saturn the currently selected object using the Find object icon on the left-hand toolbar. Then press the GoTo button on the
Find object screen or press the g key at any time after you have made Saturn the currently selected object.
Now let's use SpaceEngine to explore the Milky Way galaxy. First, let's go to our nearest stellar neighbor, Alpha Centauri, also known as Rigel Kentaurus. Just open the Find object icon on the left-hand toolbar and type in "Rigel Kentaurus". Now you will see three entries for Rigel Kentaurus because Rigel Kentaurus is actually a double star system. The first entry is for the midpoint barycenter that the stars Rigel Kentaurus A and Rigel Kentaurus B orbit about each other. Select the first entry for Rigel Kentaurus and press the Enter key to make the barycenter for Rigel Kentaurus A and Rigel Kentaurus B the currently selected object. The information on your screen will now tell you that the Rigel Kentaurus barycenter is about 4.37 light years away. Press the c key to center Rigel Kentaurus in your field of view. Go into Free mode using the 1 key. Now set your max velocity to 1.00 light years/sec and repeatedly press the up key on your main keyboard to travel to Rigel Kentaurus in spurts. When you begin to get very close to Rigel Kentaurus, you will begin to see that it really does consist of a pair of stars, Rigel Kentaurus A and Rigel Kentaurus B. Be sure that you have the orbits enabled for multiple star systems by clicking on the cogwheel icon on the right-hand toolbar. Make sure the Orbits checkbox is checked and that the Suns checkbox is also checked so that you can see their orbits. Use the arrow keys on the lower left-hand toolbar to speed up time. That will let you see Rigel Kentaurus A and Rigel Kentaurus B orbiting each other.

Figure 9 – Here we see Rigel Kentaurus at a distance of 0.08 light years. Notice that it is now much brighter, but still looks like just one star. Make sure that the Orbits and Suns checkboxes are checked so that you will be able to see the orbits of Rigel Kentaurus A and Rigel Kentaurus B about their common barycenter.
Now it turns out that Rigel Kentaurus is actually part of a triple star system. The third star is called Proxima, and Proxima is actually the closest star to the Sun at this time. So use the Find object dialog box to find Proxima. Press the Enter key to make Proxima the currently selected object. The text on the SpaceEngine screen will then tell you that Proxima is about 0.22 light years away from the Rigel Kentaurus barycenter. Now press the c key to center Proxima in your field of view. Proxima is a dim red dwarf and pretty hard to see even at 0.22 light years. Make sure the Selection pointer icon is turned on in your right-hand toolbar so that pointer lines will help you see Proxima in the distance. Then use your right mouse key to orbit around Rigel Kentaurus so that you can see Rigel Kentaurus A and Rigel Kentaurus B in the foreground with Proxima in the background.

Figure 10 – Above we see Rigel Kentaurus A and Rigel Kentaurus B orbiting their common barycenter with a very dim Proxima in the background.
Now, let's go to the beautiful Pleiades open cluster. Just open the Find object icon on the left-hand toolbar and type in "Pleiades". Then select the Pleiades cluster and press the Ok button to make the Pleiades cluster the currently selected object. The information on your screen will tell you that the Pleiades cluster is about 365.30 light years away and has a diameter of about 15.15 light years. Press the c key to center the Pleiades cluster in your field of view. Go into Spacecraft mode using the 2 key. Now set your max acceleration to 10.00 light years/sec2 and press the up key on your main keyboard to set sail for the Pleiades cluster. As you approach the cluster you will see nearby stars fly by. Now press the z key to stop moving. At this point, you will see that you are still Following Earth on the lower left-hand toolbar. If you use the Find object icon on the left-hand toolbar to find the Earth and then press the Ok button to make the Earth the selected object again, you will find that you might be very far from the Earth, like 280 light years. Now if you press your right-hand mouse key and move your mouse around you will begin to orbit the Earth with a parallax baseline of 280 light years! Consequently, you will now see many stars fly by at varying speeds. The closer stars will move quickly and the more distant stars less quickly. Now search for the Pleiades cluster on the Find object screen again and press the Go to button. That will take you to about 15.5 light years from the Pleiades cluster. Now you will find that you are Following Pleiades on the lower left-hand toolbar. Use your right mouse button to orbit around the perimeter of the cluster. Then use the up arrow key on your main keyboard to enter into the cluster. When you get close to the center of the cluster as displayed on the SpaceEngine screen information, stop with the z key. Now you can orbit around the very center of the cluster with your right mouse button. Now double-click one of the stars in the cluster to make it the currently selected object. The SpaceEngine information text will tell you the name of the star and how far away it is. Then press the Shift-f key to start Following that star and then the c key to center the star in your field. Now you can orbit around the star at your current distance from the star and see the Pleiades cluster spin by. If you press the g key, SpaceEngine will take you to the star with its autopilot. Now you can use your right mouse button to orbit around the star and see the Pleiades cluster all around you.

Figure 11 – SpaceEngine autopilot can quickly take you to the Pleiades open cluster.
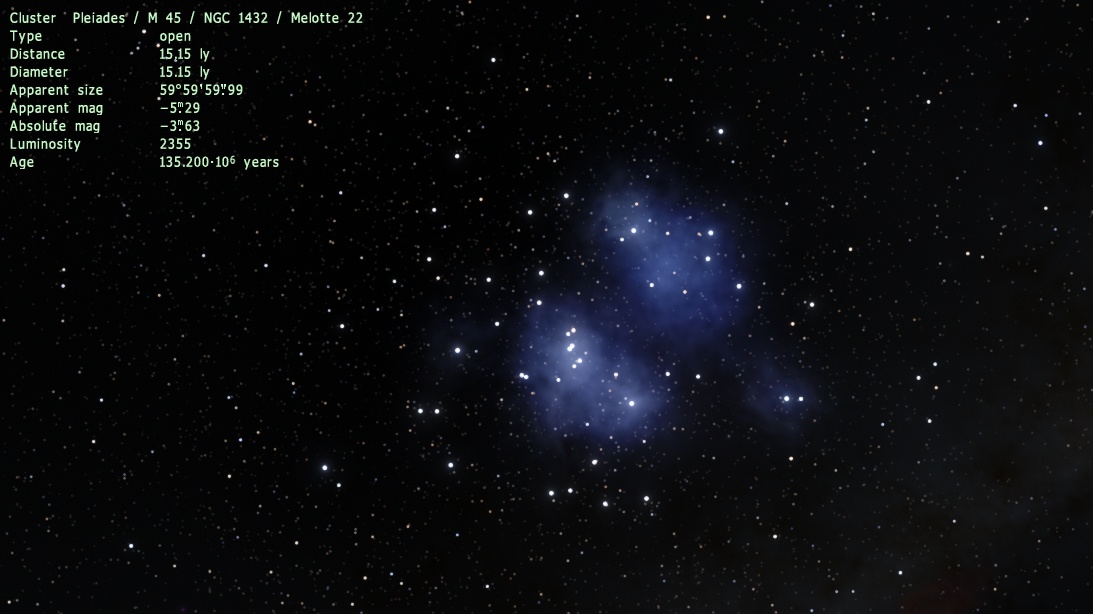
Figure 12 – Once there, use your right mouse button to orbit the Pleiades cluster and view it from many directions. Here we see the Pleiades cluster from a different angle than we see from the Earth. Then use the up arrow key on your main keyboard to enter the Pleiades cluster.

Figure 13 – Once inside of the Pleiades cluster you can use your mouse right button to orbit around the center of the Pleiades cluster. If you double-click on one of the stars in the Pleiades cluster, you can then travel to that star by pressing the g key.
Now let's move a bit closer to the edge of the Milky Way galaxy. Use the Find object icon on the left-hand toolbar to find the globular cluster M 13. You will find that it is 25.11 thousand light years away. Now you could center on it and start flying to it manually to see all the stars fly by, but the fastest way to get there is to press the g key after you select M 13 to let autopilot take you quickly there.

Figure 14 – SpaceEngine autopilot can quickly take you to the globular cluster M 13. Once there, use your right mouse button to orbit M 13 and view it from many directions. Then use the up arrow key on your main keyboard to enter the globular cluster M 13.
Once you get to the globular cluster you can orbit around M 13 with your right mouse button. You will see the Milky Way galaxy rotate by in the near distance. Now click on the Universe map icon on the left-hand toolbar. It is the 3rd icon from the top. You will now see a 3-D map of objects that are centered on M 13. Check the Grid checkbox, but uncheck the Lines, Markers and Labels checkboxes on the dialog box. You can rotate the map sphere with your right mouse button. There is a zoom slider to the right. Use the zoom slider to see that M 13 consists of a huge sphere of stars. As you zoom out, you will then see that M 13 is not in the plane of the Milky Way galaxy. Instead, M 13 is one of the globular clusters in the halo of the Milky Way galaxy.

Figure 15 – The Universe map icon on the left-hand toolbar will show you what is near to the globular cluster M 13.

Figure 16 – If you zoom out, you will see that M 13 is in the halo of the Milky Way galaxy.
If you zoom out even further, you will begin to see the nearby galaxies of the Milky Way. If you click on one of these galaxies, SpaceEngine will draw a right triangle in red showing the distance and the distance components of the galaxy. Now check the Lines, Markers and Labels on the dialog box to see more information about the neighborhood.

Figure 17 – Zoom out some more to see the galaxies in the neighborhood of our Milky Way galaxy.
The dialog box also has a Center button that lets you shift the map to the object you just clicked and a GoTo button to take you to that clicked object. Close the Universe map and go back to the main view of M 13. Now use the up arrow key on your main keyboard to start entering the globular cluster. Adjust your velocity if necessary. You will see tons of stars flying by as you get close to the center of the M 13 globular cluster. Turn the Labels on using the Labels icon on the right-hand toolbar. You will see that all of the stars have names that begin with "RS". That means they are all machine-generated procedural stars. That makes sense because we cannot resolve the individual stars in the core of M 13 from the Earth with telescopes.

Figure 18 – If you travel towards the center of M 13, you will see many machine-generated procedural stars fly by. When you get near the center of M 13 you can orbit around its center with your right mouse button and see that you are surrounded by stars that swirl by.
To make this more evident, click on the cogwheel on the right-hand toolbar. Uncheck the Procedural checkbox under Stars and all of the M 13 stars will disappear. So if you are a purist, and only want to see objects that we have already observed from the Earth, just uncheck all of the Procedural checkboxes on the Show objects dialog box.

Figure 19 – Here we are looking again at the globular cluster M 13 from a distance, but in this case, I have turned off all of the machine-generated procedural stars. That makes M 13 disappear because all of the SpaceEngine stars for M 13 are machine-generated procedural stars. All I now see is our Milky Way galaxy in the background.
Recording Your Adventures in SpaceEngine
SpaceEngine keeps a Journey log of all your recent adventures. Just click on the spiral notebook icon on the left-hand toolbar to take a look. You can return to these locations with its GoTo button. You can permanently keep a particularly interesting location with the Locations icon on the left-hand toolbar. The Locations icon looks like a flag. Just Add your current location and you can always come back to it later. You can also click on the Copy button on this dialog box to copy its parameters to the Windows clipboard. Then do a Ctrl-v in WordPad to copy the results to a file. The Body parameter is of most interest because you can later open the SpaceEngine console with the ~ key and then paste in a GoTo for the Body location, like GoTo RSC 8474-1634-3-393-515 4. Below is some sample information Copied from a SpaceEngine Location:
Place "Planet Cool gas giant"
{
Ver 980
Body "RSC 8474-1634-3-393-515 4"
Parent "RSC 8474-1634-3-393-515"
Date "2019.06.25 22:49:23.07"
Pos (-00000000000016C5E3D9F7A81E0C85F5 +00000000000011DD94BDF27006F3A758 -000000000000081887D1E3D30A67158E)
Rot (-0.6666082815695096 -0.3306698762081042 -0.5318751609459846 -0.4042272196180575)
Vel 3.2407764e-016
Mode 2
}
You can also take pictures of your adventures. When you have generated a particularly beautiful scene, just press F11 to record the scene in a .jpg file that displays the scene without any of the SpaceEngine toolbars or information displayed. To record the scene as it appears on your screen with all of the SpaceEngine stuff included, press Ctrl-F11. The image files will be written to the C:\SpaceEngine\screenshots folder.
Observing Machine-Generated Procedural Objects
While you are in the middle of the M 13 globular cluster, double-click on the field of stars. SpaceEngine will then make the star that is closest to your double-click the currently selected object. The information on your screen will tell you all about the selected star. Make sure your selected star is less than 50 light years away so that we know that it is a member of the M 13 globular cluster and also make sure it has some planets. By the way, if ever you do not want to see information displayed about the currently selected object, use Ctrl ~ to cycle through Full, Brief, or No displayed information. Now use the g key to go to that stellar system. Press the Planetary system icon on the left-hand toolbar. That will display a set of thumbnails of the planets of the planetary system and a bit about each planet. In the lower right of the planet thumbnails, there will be an icon for the planet's moons. Click on that icon to bring up thumbnails for the planet's moons. If you click on one of the planet thumbnails, it will then become the currently selected object and list lots of information about the planet. You can use the c key to center on the planet and the g key to go to the planet. Once you get to the planet, you can do all of the things that you did for a real planet like the planet Earth. You can orbit around the planet with your right mouse button, speed up time to see it spin and move in its orbit, land on the planet and move around it, blast off and leave the planet, climbing through its atmosphere and clouds, until you see all of the stars come out. It's great fun and highly educational for everybody.

Figure 20 – Here is the machine-generated procedural star system RSC 8474-1634-2-21-488 which is a Binary Star G2.6 III stellar system with its machine-generated procedural planets, moons, asteroids and comets.
Now try all of this for M 31 the great spiral galaxy in Andromeda. Select M 31 in the Find objects dialog box and then start flying towards it at 20 - 30 light years per second. Watch the stars of our Milky Way galaxy fly by. Then after you have left the Milky Way galaxy, select the Milky Way galaxy in the Find objects dialog box again and center on it to get a view back to our home galaxy. Be sure to press the Shift-f keys so that you will be Following Milky Way. Now try orbiting the Milky Way galaxy with your right mouse key. Fantastic!

Figure 21 – On your way to M 31, the great spiral galaxy in Andromeda, take a look back at our Milky Way galaxy. Here we are looking back at the Milky Way Galaxy from a distance of 74.27 kly or 74,270 light years.
Then reselect M 31 and press the g key to quickly autopilot to the galaxy. Now you have several hundred billion machine-generated procedural star systems to explore as you did for the globular cluster M 13. If you go into the Universe map around M 31, you can see some of its neighboring galaxies. You can then select one of those galaxies and then fly to it with the g key. So now you can explore machine-generated procedural stars in all the galaxies we have seen from the Earth. But there is lots more. You can explore all of the machine-generated procedural stars in the machine-generated procedural galaxies in a cube that is 10 gigaparsecs on a side. That should keep you busy!
How to Find Objects with SpaceEngine
There are several ways to find objects in SpaceEngine. We have already talked about the Find object icon on the left-hand toolbar. Another way to find objects by a selection category is to use the Star browser icon on the left-hand toolbar. The Star browser icon looks like a field of stars. When the Star browser opens up, enter the search distance in light years. Then click on the Filter settings to bring up a dialog box that lets you specify what you are looking for. For example, in Figure 22, I am just looking for black holes within 200 light years of the Earth.

Figure 22 – Using the Star browser to look for black holes within a distance of 200 light years of my current position - the Earth

Figure 23 – Here are the results for looking for black holes within 200 light years of the Earth
Figure 24 below shows what I see when I use the SpaceEngine g autopilot key to go to the machine-generated procedural black hole RS 8474-1792-8-9446687-365. If I orbit around this black hole with my right mouse button, I can see it distort the background field of stars.

Figure 24 – Black hole RS 8474-1792-8-9446687-365. If you orbit around the black hole with your right mouse button, you can see the massive gravity of the black hole distorting the background stars near its edge.
Naturally, all of the black holes are machine-generated procedural black holes because we have not directly observed any yet, but you can go to the massive Sagittarius A black hole at the center of our Milky Way galaxy that we have inferred by the rapid orbital motions of stars about Sagittarius A - see Figure 25.

Figure 25 – Sagittarius A - the massive black hole at the center of our Milky Way galaxy with its accretion disk.
Another way to find objects is by elimination. For example, in Figure 26 I am looking at the Sun. I opened the Show objects dialog box by clicking on the cogwheel on the right-hand toolbar. Then I turned off displaying everything but planets to make it easier to see planets, asteroids and comets. I also turned on the orbits for planets so that I could see the ecliptic plane. Since asteroids and comets are too dim to see at this scale, I turned on the Markers for asteroids so that I could see where the asteroids were. Then when I click on one of the asteroid markers, SpaceEngine tells me all about it and also displays the orbit of the asteroid in red. Then you can go to the asteroid with the g key and land on it.

Figure 26 – Looking for asteroids near the Sun by turning off all the other objects.

Figure 27 – If you click on one of the asteroids, it will become the selected object in SpaceEngine and you can learn all about it. For example, above we have selected asteroid Wirt.

Figure 28 – We can then travel to asteroid Wirt with the g key. Notice that asteroid Wirt has a companion asteroid. Both asteroids orbit each other, which can be seen by speeding up time with the l key.

Figure 29 – If you click on the companion asteroid to select it, you can then land on the companion using the Land on object icon on the lower left toolbar. Then you can see asteroid Wirt from your landing position on the companion asteroid.
Do you remember comet Hale-Bopp back in 1997? It was the most brilliant naked-eye comet of my lifetime and looked great in my rich field 6-inch f/4 telescope. However, it never looked as brilliant as it does in Figure 30.

Figure 30 – Comet Hale-Bopp back on April 20, 1997.
Charting a Planetary System with the SpaceEngine System Chart
Next, let's learn how to use the SpaceEngine System chart icon on the left-hand toolbar. It is the fifth icon from the top and has two little planets on it. This one took a bit of time to figure out because you need to be in just the right spot to use it effectively. All the System chart icon does is to take the current space around a stellar system and reorient the space with all of the objects of the stellar system, such as all of the planets, moons and asteroids, and line all of the objects up in a straight line in space sorted by size. Once you realize that, the System chart is very easy to use because everything that you have learned about navigating your SpaceEngine camera around in space still applies. For example, you can use the Find object icon to find an object in the line of objects. You can use the c key to center on an object and the g key to go to an object. You can accelerate to or from an object with your keyboard arrow keys in Free mode, Spacecraft mode, or Aircraft mode.

Figure 31 – The SpaceEngine System chart icon moves all of the objects in a stellar system into a straight line in space sorted by size. You can then use all of the things that you have learned about navigating the SpaceEngine camera in this new space.
All of the toolbars can be used just like before. All you have to do is to always keep in mind that the System chart icon just really moves all of the objects around in space so that they line up in a straight line sorted by size. The main problem is to find the line of objects. That is pretty easy in our Solar System because you can just use the Find object icon to find an object that you are familiar with, such as the planet Venus. That is not so easy for machine-generated procedural stellar systems. In that case, just use the Planetary system icon on the left-hand toolbar to show you the planets and moons of the system. Then click on one of the objects displayed by the Planetary system icon to make it the currently selected object. Then use the g key to go to that object in the line of objects presented by the System chart. You might want to accelerate away from that object a bit so that you can see the long line of objects sorted by size in the distance. You will then be free to travel from one object to another, land on objects, follow objects using the Shift-f key after you select them, orbit objects using your right mouse button...

Figure 32 – For machine-generated procedural stellar systems, use the Planetary system icon on the left-hand toolbar to show you the planets and moons of the system. Then pick an object and go to the object with the g key. Accelerate away from the object a bit and you will then be able to find the long line of stellar objects sorted by size.
You can use the SpaceEngine System chart icon in our Solar System to only display certain objects by a min or max size or by a category, such as only displaying asteroids.

Figure 33 – You can use the SpaceEngine System chart icon in our Solar System to do things like sort asteroids by size by checking the Asteroids checkbox and leaving the other checkboxes unchecked.
SpaceEngine Compound Motions
Thanks to the powers of 21st-century hardware and software, you can use SpaceEngine with dramatic compound motions. For example, you can speed up time by a factor of 100,000 to watch two asteroids orbit each other while you are simultaneously speeding away from them at 300 km/sec and also orbiting the pair with your right mouse button depressed. This makes for some very impressive compound motions on your screen and can really help to bring it all alive for you. You can also center objects with the c key while you are rapidly moving through space and also use all of the other SpaceEngine features like the Find object icon while moving or your SpaceEngine camera is rotating. You can change options while all of this is going on too, such as turning off all the machine-generated procedural galaxies while speeding through the Universe at 200 million light years per second. Warning - Prolonged use of SpaceEngine may be habit-forming.
So far we have seen that SpaceEngine will let you explore nearly an infinite number of real and machine-generated procedural worlds. But if you want even more star systems to explore, you can create your own galaxies, stars, planets, moons, comets and asteroids with C-like script files that SpaceEngine reads. That is all covered in detail under the MANUAL tab on the
SpaceEngine home page. This feature should be very useful for researchers working on exoplanet systems. There is nothing like being able to generate a simulated exoplanet system for one that you have actually discovered and then exploring it in 3-D with SpaceEngine. So let's cover that topic next in our tutorial.
How To Create Your Own Model of an Exoplanet Star System
IT professionals never write code from scratch. That is way too hard to do. IT professionals always generate new code by using the Darwinian processes of inheritance, innovation and natural selection to bring forth new software. So first, we need some existing code to produce a star for our exoplanet star system. Then we can add some newly discovered planets to the exoplanet star. Once we have inherited some starter code for a star and some starter code for an exoplanet, then we can then slowly make small modifications to the new star and planet in SpaceEngine to model what our astronomical hardware has actually discovered. As an example, let's start to create a new exoplanet star system by using the star Vega and one of its machine-generated procedural planets as some inherited starter code that can be modified over a number of iterations to produce a model of a newly discovered exoplanet system. First, use the Find object icon on the left-hand toolbar to find the star Vega and then GoTo Vega. Once you get to Vega, click on the star to make it the currently selected object. Then press Shift-F2 to bring up the star/planet editor. You should then see something like Figure 34 below.

Figure 34 – Screenshot of the star Vega after the SpaceEngine star/planet editor has been called up by pressing Shift-F2
The star/planet editor lets you interactively change the Physical properties of the currently selected object. For example, in Figure 34 we see that Vega is an A0 V star. You can then change the Physical properties of Vega by using the sliders. You can also change the values by clicking on the numeric values to the right of the sliders and then typing in the exact value that you desire. To see the effect of your changes, just click on the Update button. Note that this does not make a permanent change to the Physical properties of Vega that are stored in the SpaceEngine files for Vega. It just changes the Physical properties of the Vega that is currently in the memory of your computer. To save the altered Physical properties of Vega, press the Export button. This will write the file C:\SpaceEngine\export\Vega.sc that can be edited with the Windows Notepad editor. Figure 35 is a screenshot of the top portion of the generated C:\SpaceEngine\export\Vega.sc file. You can then edit this file with the Windows Notepad editor to create the central star of your exoplanet system. Just change the name of the Star from "Vega" to "Exoplanet Star" or whatever you wish. Also, change the ParentBody from "Vega" to "Exoplanet Star" too. Then change the Physical properties of the star to the Physical properties of the central star of your exoplanet system. Now go to the C:\SpaceEngine\addons folder and create the folder path C:\SpaceEngine\addons\catalogs\stars. Now copy C:\SpaceEngine\export\Vega.sc to C:\SpaceEngine\addons\catalogs\stars\ExoStar.sc - the filename ExoStar.sc can be any name so long as it has a ".sc" extension.

Figure 35 – Screenshot of the top of the Vega.sc file that was Exported from SpaceEngine. Be sure to change the name of the Star and the ParentBody to the same string that you want to use for your exoplanet system, like "Exoplanet Star" or whatever you wish. Also add lines for the Declination, Right Ascension and the Distance to the star system in parsecs.
Now start up SpaceEngine and use the Find object icon to look for the "Exoplanet Star" and then GoTo the star. If you press the Planetary system icon on the left-hand toolbar you will see that your new Exoplanet Star may have a number of machine-generated procedural planets and moons generated for it. That is because we have not specified any of our own planets for the Exoplanet Star system yet. To do so, go back to Vega, or any other star with planets, to get some starter code for a planet. You can even use one of the machine-generated planets for the Exoplanet Star. Then use the Planetary system icon on the left-hand toolbar to select one of the planets in the system. Then go through the same process. Press Shift-F2 to bring up the star/planet editor and then push the Export button. Export the selected planet to something like a C:\SpaceEngine\export\Exoplanet1.sc file. Now copy the C:\SpaceEngine\export\Exoplanet1.sc file to a C:\SpaceEngine\addons\catalogs\planets folder. Then edit the C:\SpaceEngine\addons\catalogs\planets\Exoplanet1.sc file with the Windows Notepad editor.

Figure 36 – Screenshot of a planet to be Exported to a C:\SpaceEngine\export\Exoplanet1.sc file to give us an example planet script file to work with.

Figure 37 – Screenshot of the top of the Exoplanet1.sc file that was Exported from SpaceEngine and was then edited to produce planet "Exoplanet_1".
Be sure to change the name of the Planet to something like "Exoplanet_1", or whatever you wish. Then change the ParentBody to the exact name of the star that you used in the C:\SpaceEngine\addons\catalogs\stars\ExoStar.sc file. In our example that would be "Exoplanet Star". Then go to the Orbit section of the exoplanet and change the SemiMajorAxis to the number of Astronomical Units that the exoplanet is from its central star. Delete the Period line since the exoplanet will have a different period than the planet we are copying. SpaceEngine will automatically calculate the Period of the exoplanet based upon the mass of its central star and the distance of the exoplanet from the central star. In fact, SpaceEngine will calculate all sorts of things like the surface temperature of the exoplanet. If you do not like the calculated results, just use Shift-F2 to override the calculated values with the values you would like to use. You can also use the Windows Notepad editor to hard-code the values you want to use in the C:\SpaceEngine\addons\catalogs\planets\Exoplanet1.sc file.
Now start up SpaceEnging again and use the Find object icon to look for the string "exoplanet". You should now see both the "Exoplanet Star" and the "Exoplanet_1" listed. You can then GoTo that planetary system to refine it. Use the SpaceEngine star/planet editor to refine the Physical properties of the new star and planet. You can then Export the edited results to files in the C:\SpaceEngine\export folder and then copy them back to the C:\SpaceEngine\addons\catalogs\stars and C:\SpaceEngine\addons\catalogs\planets folders. Now you can go through the iterative process of refining your new exoplanet stellar system that all IT developers go through. Simply use the SpaceEngine star/planet editor to view and refine changes to the Physical properties of the exoplanet system and then Export the changes to the C:\SpaceEngine\export folder. Then copy those refined files to the C:\SpaceEngine\addons\catalogs\stars and C:\SpaceEngine\addons\catalogs\planets folders and restart SpaceEngine to do further refining work on the exoplanet system. If your new exoplanet system, has more than one discovered planet, just clone a planet .sc file and add it to the C:\SpaceEngine\addons\catalogs\planets folder.

Figure 38 – Once you have created the "Exoplanet Star" and the "Exoplanet_1" exoplanet system, you can view it in SpaceEngine and use SpaceEngine to travel around it.
Another convenient way to portray an entire exoplanet stellar system in a single file is to use the gaming convention of using .pak files. For SpaceEngine, a .pak file is simply a compressed .zip file that uses a file extension of .pak instead of .zip. To create an Exoplanet.pak file for your newly defined exoplanet system, simply go to the C:\SpaceEngine\addons folder. Then click on the catalogs folder to highlight it. Next, right-click on the catalogs folder and select the Send to > Compressed (zipped) folder option. Rename the generated "catalogs.zip" file to "exoplanet.pak". The "exoplanet.pak" file contains compressed versions of all of the files under your current C:\SpaceEngine\addons\catalogs folder. The compressed C:\SpaceEngine\addons\exoplanet.pak file will be read by SpaceEngine each time it starts up. So you can use this single file to have SpaceEngine display your exoplanet system instead of the individual files that you have been working with. If you email the exoplanet.pak file to a colleague, your colleague can simply copy the file to the C:\SpaceEngine\addons folder in order for your colleague to explore your new exoplanet system with SpaceEngine. If your colleague renames the exoplanet.pak to exoplanet.zip and right-clicks on the exoplanet.zip file, your colleague can then Extract All of the files to another folder system for their own use. If you go to the SpaceEngine Forum > Mods and Addons section of the SpaceEngine website, you can download some very interesting and useful .pak files from other SpaceEngine users. Simply copy the downloaded .pak files to your C:\SpaceEngine\addons folder to make use of them.
Traveling Through the SpaceEngine Universe with a Spacecraft
SpaceEngine does allow you to build various kinds of spacecraft with the Spacecraft manager icon on the left-hand toolbar. You can then travel through the SpaceEngine Universe with a spacecraft instead of the SpaceEngine camera. Actually, you still use the SpaceEngine camera to view the SpaceEngine Universe, but the camera now follows a spacecraft when traveling in Spacecraft mode. There is a lengthy Flight School tutorial under the MANUAL tab on the SpaceEngine website that explains in detail how to fly a SpaceEngine spacecraft so I will not be detailing that here. But again, I have some useful tips to help you get started.
My first inclination was that the SpaceEngine spacecraft feature might just be another kind of video game. Personally, I am a bit too old for video games and being a member of the pinball generation, video games did not really come out until my children were of playing age. So I was just a bystander of it all. Not having a neural network trained for video games and still having a big problem with parallel parking in the city, I did not have much hope for successfully completing the SpaceEngine Flight School tutorial, but I decided to give it a try anyway. To my surprise, I discovered that the SpaceEngine spacecraft feature is a great way to get a real feel for Newtonian mechanics and Newtonian gravity at work and the fundamental difficulties of orbital dynamics. It would be a great tool for teaching those subjects.
Before embarking on a SpaceEngine adventure with a spacecraft, it is important to understand a bit about the SpaceEngine Universe. Recall that it is a cube that is 10 gigaparsecs (32.6 billion light years) on a side that contains the real objects that we have already observed and a very large number of scientifically-feasible machine-generated procedural objects. It is important to realize that the stars within this cube are fixed. The stars within that cube do not have any proper motions and the spacetime between galaxies is not expanding. However, the stars in binary, triple and quadruple star systems do orbit each other around barycenters, but otherwise, the stars are fixed in space. Take a trip to the quadruple star system of Mizar in the handle of the Big Dipper for a good example of that. The other thing to keep in mind is that the SpaceEngine camera is truly a magic carpet. The SpaceEngine camera travels in straight lines and is not deflected by the gravitational forces of nearby bodies, and the SpaceEngine camera does not experience aerodynamical drag or lift when traveling through atmospheres, no matter how dense they might be. The SpaceEngine camera can also accelerate to a speed of a billion light years per second in 10 seconds and then stop on a dime when you press the z key. The SpaceEngine camera can also freely move around even when you stop time with the spacebar. So the SpaceEngine camera does not obey the rules of Newtonian mechanics and Newtonian gravity and certainly not the effects of aerodynamics. On the other hand, SpaceEngine spacecraft do behave in accordance with all of the physics just mentioned and that makes SpaceEngine spacecraft the perfect tool for teaching such subjects.
SpaceEngine will let you build 23 different spacecraft with the push of a single button. As an example, first, fly the SpaceEngine camera to the asteroid Vesta and then land on it. Next, go up a few hundred meters and then build a Skylone shuttle as outlined in the Flight School tutorial.

Figure 39 – Once your SpaceEngine camera arrives at the asteroid Vesta and you land on Vesta, you can build a Skylone shuttle with the push of a single button.

Figure 40 – Once you Take control of the Skylone shuttle you will see the Hor HUD display.
You can always take control of your latest spacecraft with the 4 key. There are four HUDs - Hor, Orb, Warp and Dock. The Flight School tutorial goes into great detail explaining them. You can switch from one to another at any time by clicking on one of the buttons. Each HUD display just tells you different information about the spacecraft that you are currently controlling. The bank of buttons directly below the HUD buttons let you see the spacecraft from different views. To get your spacecraft really moving quickly you need to use the engine sliders on the far left. The Main engines slider accelerates you forward, while the Retro engines slider decelerates your spacecraft. The Hover engines slider pushes your spacecraft upward. Now to make small adjustments to the spacecraft's velocity, you need to use its thrusters. The spacecraft's thrusters are little rocket engines that are used for orienting the spacecraft. The arrow keys on your numeric keypad work the thrusters that rotate your spacecraft. The arrow keys on your main keyboard work the thrusters that give your spacecraft a little push forwards, backwards, to the left or to the right. The double bank of buttons just to the right of the HUD buttons are autopilot buttons that will have your computer automatically operate the thrusters to move your spacecraft to different orientations and hold that orientation using the spacecraft's thrusters. The thing to keep in mind is that if any of the autopilot buttons are turned on, your arrow keys will really not do much because as soon as you stop pressing one, the autopilot will immediately take over control of the thrusters to return the spacecraft to its designated autopilot orientation. So if you really want to manually change the orientation of your spacecraft with the arrow key thrusters, be sure to unpush all of the autopilot buttons!

Figure 41 – To go back to the camera mode, just press the 1, 2 or 3 key. Here we see the Skylone shuttle rising under power above Vesta using the SpaceEngine camera mode.
Another thing to keep in mind is that you can always go back to the SpaceEngine camera mode by pressing the 1, 2 or 3 key while the spacecraft is moving. Then you can move the camera all around the spacecraft to view it from different angles. You can even fly the SpaceEngine camera to a different star system while your spacecraft continues on. To regain control of the spacecraft, just press the 4 key.

Figure 42 – Once you get to a decent altitude above Vesta, just push the Horizon autopilot button on the far right and then crank up your Main engines for a bit to put yourself into a stable orbit.
By far, the most difficult thing to do in SpaceEngine is to dock a small Skylone shuttle with a much larger Starship. To do that, you need to create a large Starship and a Skylone shuttle. Then use the SpaceEngine Dock HUD to help you do the docking. SpaceEngine will then present to you the docking green rectangles of 2001 - A Space Odyssey to guide you.

Figure 43 – Use the SpaceEngine Dock HUD to help you dock your Skylone shuttle to a much larger Starship. SpaceEngine will then present to you the docking green rectangles of 2001 - A Space Odyssey to guide you.
I have never been able to dock a Skylone shuttle. It is by far much harder than parallel parking in downtown Chicago! Here is a tip. Stop time with the spacebar. Then press the 1, 2 or 3 key to get into camera mode. Now you can freely move the SpaceEngine camera all over the place to see where the heck the Starship and Skylone shuttle are before you make your next move. Then press the 4 key to take control of the Skylone shuttle to make your next move in docking.

Figure 44 – Stop time with the spacebar. Then use the 1, 2 or 3 key to get into camera mode and take a look around before trying your next docking maneuver.

Figure 45 – Here we have a slowly rotating Cruise ship and a Skylone shuttle in orbit around the Moon. The rotating Cruise ship provides a sense of artificial gravity due to centripetal acceleration, but it makes it very difficult for the Skylone shuttle to dock with it.
I have never been able to do so! But to really recreate the docking scene in 2001 - A Space Odyssey, you have to take control of the Starship and use its thrusters to get it rotating like the space station in
2001 - A Space Odyssey and then try to dock with a rotating Starship! To do that, take control of the Starship spacecraft and then push either the 7 or the 8 key on your numeric keypad. That will get the Starship spacecraft rotating like the space station in 2001 - A Space Odyssey. You really need a computer to do that kind of docking!
A rotating barrel-shaped spacecraft is also a very useful teaching aid for comparing the geocentric and heliocentric models of the Universe. Once you get a barrel-shaped spacecraft rotating along its central axis, you can use the Shift-r and Shift-f keys to switch back and forth between the Rotating with and Following reference frames of the spacecraft. When you are Rotating with the spacecraft you will see all of the background stars rotating about you, while in the Following reference frame you will see the fixed stars standing still and the spacecraft rotating.
Finally, SpaceEngine allows your spacecraft to travel much faster than the speed of light through the SpaceEngine Universe using an Alcubierre warp drive. The Alcubierre warp drive creates a bubble of spacetime in which spacetime contracts in the front part of the bubble and expands in the back part of the bubble. This allows your spacecraft to effectively travel with a maximum velocity of about 100 light years per second.

Figure 46 – Here we see a Barrel-1 Starship in an Alcubierre warp drive bubble traveling at warp factor 12, effectively traveling millions of times faster than the speed of light by contracting spacetime in front and expanding spacetime in the back.
The easiest way to use the warp drive on your spacecraft is to use the two autopilot buttons on the lower right corner of the autopilot bank of buttons on the spacecraft's HUD. These are the Hyperjump and Go to buttons. The Hyperjump button will use the warp drive of your spacecraft to take it to the vicinity of the Target that is displayed in red in the upper right of each HUD display. The Go to button will do the same thing using the conventional engines on your spacecraft. To start your autopilot journey, first set the Target. That can be done in a number of ways. First, you need to push the Target button on any of the HUD displays for your spacecraft. Then choose the Target by double-clicking on a star, planet, asteroid ... that is in your current camera view. You can also use the Find object button or an item in your Journey log or Locations list to specify the Target. If you would like to change the Reference body listed on the HUDs, follow the same process. When you start your autopilot journey, distances and velocities will be listed relative to the Reference body and the Target. Now press the Hyperjump button to let the autopilot of your spacecraft take control. The first thing the autopilot will do is to use the spacecraft's conventional engines to get the spacecraft moving about 10 km/sec in the direction of the Target. Then it will kick in the spacecraft's warp drive and begin to increase the spacecraft's Boost exponent. During the entire journey, the spacecraft will remain traveling at 10 km/sec within its Alcubierre warp drive bubble. Getting the spacecraft's velocity to 10 km/sec in the direction of the Target with conventional engines can take a very long time, so speed up time a bit until you see the Alcubierre warp drive bubble form, then hit the \ key to return to normal time.

Figure 47 – Above is the Warp HUD for an Explorer-1 Starship just beginning to use its warp drive. We see the Explorer-1 Starship in its Alcubierre warp drive bubble.
Figure 47 shows an Explorer-1 Starship just beginning to use its warp drive under the control of its Hyperjump autopilot. The Starship is on an 8.44 light year journey from the Earth to the star Sirius A. At this point in its journey, it has a Boost exponent of 4.920. Boost exponents are logarithmic, so that means the warp drive is boosting the 10 km/sec velocity of the Explorer-1 Starship by a factor of 104.920 = 83176 times. So the Explorer-1 Starship is now traveling with an effective velocity of 831,760 km/sec or 2.77 times the velocity of light c. The autopilot was in the process of accelerating the Explorer-1 Starship to a Boost exponent of 12 when the screenshot for Figure 47 was taken. When the Explorer-1 Starship reaches a Boost exponent of 12, it will then have an effective velocity of 1012 * 10 km/sec = 1013 km/sec = 33,300,000 times the velocity of light c. The Hyperjump autopilot will take you to within several thousand kilometers of the Target and then crank down the warp drive of your spacecraft. That will leave your spacecraft heading towards your Target with a 10 km/sec velocity. To finish the trip you will need to use the spacecraft's conventional engines to manually attempt a landing and deal with all of the Newtonian mechanics, Newtonian gravity and aerodynamics of that feat. The Go to button will also take your spacecraft very close to the Target using conventional engines, but will not land your spacecraft for you. Good luck! I usually end up with my spacecraft crash-landed and half-submerged in my Target.
As an example of how SpaceEngine could be used to inspire young people into the sciences and help researchers to do astronomical simulation work, I would now like to recall some of my own personal experiences with scientific simulation software.
My Personal Adventures with Scientific Simulation Software
Mankind has made three great technological leaps in my lifetime, the rise of software and computers, the dawn of the Space Age and the discovery of how DNA works. And each of these technological leaps heavily influenced the advance of the others. I was born on October 3, 1951, a few months after the United States government installed its very first commercial computer, a UNIVAC I, for the Census Bureau on June 14, 1951. The UNIVAC I was 25 feet by 50 feet in size and contained 5,600 vacuum tubes, 18,000 crystal diodes and 300 relays with a total memory of 12 KB. From 1951 to 1958 a total of 46 UNIVAC I computers were built and installed.

Figure 48 – The UNIVAC I was very impressive on the outside.

Figure 49 – But the UNIVAC I was a little less impressive on the inside.
Then, the very next day after my 6th birthday, the Russians brought us all into the Space Age.

Figure 50 - The launch of Sputnik 1 by the Russians on October 4, 1957, on top of an R-7 ICBM rocket, launched the Space Age and threw the United States of America into a Cold War panic that is now hard to imagine.
Sputnik 1 was the technological Pearl Harbor of the 1950s that threw the United States of America into a Cold War technological frenzy that is now hard to fathom and had a huge impact on the United States of America. In order to successfully operate spacecraft in outer space, you needed to put computers in them to quickly operate huge numbers of flight operations in parallel, and something like the old clunky UNIVAC I would certainly not do. To make small high-performance computers for spacecraft you needed whole new technologies and to develop such technologies you needed scientists and engineers, something that both the Republicans and the Democrats could at last both agree upon. For a brief history of the miniaturization of computer hardware see Did Carbon-Based Life on Earth Really Have a LUCA - a Last Universal Common Ancestor?. So the government of the United States of America quickly went into high gear supporting anything that had to do with the sciences and engineering, including educating the kids of the 1950s and 1960s in those disciplines. For example, during my grade school days, our teachers would drag in huge vacuum tube TV sets on carts to let us watch the live broadcasts of the launches from Cape Canaveral. That's how I initially became interested in science as a kid. Sputnik 1 also built my high school and put me through college too. You see, back in the 1950s, the School District 88 of the state of Illinois was having a hard time trying to convince the stingy local residents of the need for a new high school in the area. But all that changed in January of 1958, after the launch of Sputnik 1, when suddenly the local residents now eagerly voted in a referendum to build a new Willowbrook High School out of the fear that was generated by Sputnik 1, and of the demonstrable superiority of Russian missile technology at the time. Then in 1969, when I first began work on a B.S. in physics at the University of Illinois, the heavily government-subsidized tuition was only $181 per semester, and I was easily able to put myself through college simply by cleaning out movie theaters seven days a week during the summers at $2.25/hour. Tuition in 2018 is now about $9,500 per semester. For my M.S. in geophysics at the University of Wisconsin, my tuition and fees were waived, and I received a generous stipend to live on while working as a research assistant, courtesy of a grant from the National Science Foundation. The end result of this was that when I finished school in 1975, I had $3,000 in the bank, instead of the crushing student debt that most graduates now face.
After graduation, I explored for oil as an exploration geophysicist with Shell and then Amoco, processing digital seismic data and programming geophysical simulations in FORTRAN on mainframe computers, until I made a career change in 1979 to become an IT professional. Given the above history, as you might expect, even during the darkest and scariest days of the Cold War, I always had a bit of a soft spot in my heart for the Russian scientists and engineers who helped to educate me and who also helped to enable me to make a living as an IT professional later in life - for more on that see Cyber Civil Defense. Now with the SpaceEngine 0.9.8.0 beta software installed on my PC, once again, I now find myself profoundly awed and indebted to a Russian astronomer and programmer by the name of Vladimir Romanyuk, the author of SpaceEngine. It seems that in every century in physics we have found a Galileo, Kepler, Isaac Newton, James Clerk Maxwell, Albert Einstein, Max Planck, Erwin Schrödinger or Werner Heisenberg. In music, we have our Bach, Beethoven, Mozart, Chopin, Brahms, Liszt, Mendelssohn, Rimsky-Korsakov, Tchaikovsky and Stravinsky. And so it should go for the very first century of software. SpaceEngine plays like a beautiful symphony of astrophysics - the Music of the Spheres rendered in software. In my opinion, Vladimir Romanyuk should also take his place in the history of software along with the likes of Konrad Zuse, Alan Turing, John von Neumann and others. Now let me explain why.
Software Simulation Software Comes to the Sciences
Back in the 1950s, scientists and engineers first began to use computers to analyze experimental data and perform calculations, essentially using computers as souped-up slide rules to do data reduction. But by the late 1960s, computers had advanced to the point where scientists and engineers were able to begin to use computers to perform simulated experiments to model things that previously had to be physically constructed in a lab. This dramatically helped to speed up research because it was found to be much easier to create a software simulation of a physical system, and perform simulated experiments on it, rather than to actually build the physical system itself in the lab. This revolution in the way science was done personally affected me. I finished up my B.S. in physics at the University of Illinois in Urbana Illinois in 1973 with the sole support of my trusty slide rule, but fortunately, I did take a class in FORTRAN programming my senior year. I then immediately began work on an M.S. degree in geophysics at the University of Wisconsin at Madison. For my thesis, I worked with a group of graduate students who were shooting electromagnetic waves into the ground to model the conductivity structure of the Earth’s upper crust. We were using the Wisconsin Test Facility (WTF) of Project Sanguine to send very low-frequency electromagnetic waves, with a bandwidth of about 1 – 100 Hz into the ground, and then we measured the reflected electromagnetic waves in cow pastures up to 60 miles away. All this information has been declassified and can be downloaded from the Internet at: http://www.fas.org/nuke/guide/usa/c3i/fs_clam_lake_elf2003.pdf. Project Sanguine built an ELF (Extremely Low-Frequency) transmitter in northern Wisconsin and another transmitter in northern Michigan in the 1970s and 1980s. The purpose of these ELF transmitters was to send messages to the U.S. nuclear submarine fleet at a frequency of 76 Hz. These very low-frequency electromagnetic waves can penetrate the highly conductive seawater of the oceans to a depth of several hundred feet, allowing the submarines to remain at depth, rather than coming close to the surface for radio communications. You see, normal radio waves in the Very Low-Frequency (VLF) band, at frequencies of about 20,000 Hz, only penetrate seawater to a depth of 10 – 20 feet. This ELF communications system became fully operational on October 1, 1989, when the two transmitter sites began synchronized transmissions of ELF broadcasts to the U.S. nuclear submarine fleet.
Anyway, back in the summers of 1973 and 1974, our team was collecting electromagnetic data from the WTF using a DEC PDP-8/e minicomputer. The machine cost $30,000 in 1973 (about $170,000 in 2018 dollars) and was about the size of a large side-by-side refrigerator, with 32 KB of magnetic core memory. We actually hauled this machine through the lumber trails of the Chequamegon National Forest in Wisconsin and powered it with an old diesel generator to digitally record the reflected electromagnetic data in the field. For my thesis, I then created models of the Earth’s upper conductivity structure down to a depth of about 20 km, using programs written in BASIC. The beautiful thing about the DEC PDP-8/e was that the computer time was free so I could play around with different models until I got a good fit to what we recorded in the field. This made me realize that one could truly use computers to do simulated experiments to uncover real knowledge by taking the fundamental laws of the Universe, really the handful of effective theories that we currently have, like Maxwell's equations, and by simulating those equations in computer code and letting them unfold in time, actually see the emerging behaviors of complex systems arise in a simulated Universe. All the sciences routinely now do this all the time, but back in 1974, it was quite a surprise for me.

Figure 51 – Some graduate students huddled around a DEC PDP-8/e minicomputer. Notice the teletype machines in the foreground on the left that were used to input code and data into the machine and to print out results as well.
Now, as a former exploration geophysicist, I am now extremely worried about the effects of climate change, and I am now a strong proponent of cutting our greenhouse gas emissions by means of a high carbon tax right at the wellhead and the coal mine. For more on that please see This Message on Climate Change Was Brought to You by SOFTWARE, How to Use Your IT Skills to Save the World and 400 PPM - The Dawn of the SophomorEocene. But after graduating with an M.S. in geophysics from the University of Wisconsin in Madison in 1975, I went to work for Shell in Houston processing digital seismic data and writing FORTRAN code to model the "bright spots" we were seeing on the seismic sections from offshore Cameroon. But my wife and I soon grew homesick, and we then moved back to Chicago where I took on a job as an exploration geophysicist for Amoco in its Gulf of Suez concession.

Figure 52 - The Gulf of Suez formed as the Red Sea rifted apart at a tectonic spreading center about 35 million years ago.
One of the things I did in the Gulf of Suez was to model the strange seismic data that Amoco was working with, using the output from geophysical simulation software.

Figure 53 - Marine seismic data is collected by periodically shooting off an air gun to make low-frequency sound waves that go down and bounce off geological structures. The returning low-frequency sound waves are recorded by hydrophones and then processed by computers.

Figure 54 - After a lot of digital signal processing on computers, the recorded data is plotted out as a seismic section. The horizontal axis of the seismic section represents the distance that the recording vessel traversed while the air gun was shot and recorded. The vertical axis displays the arrival time of the reflected sound waves in milliseconds. Generally, one can see several seconds of meaningful data on a seismic section but below that is pure noise.
But something was wrong. Back in those days you generally had about a 10% chance of striking oil on a new geological structure with an exploration well. But once you found oil with an exploration well, you generally had about a 90% chance of hitting oil with the production wells that were drilled around the initial exploration well. But in the Gulf of Suez, Amoco was hitting oil with about 50% of its exploration wells! Amoco Management just loved that. The problem was that Amoco was also only hitting oil with about 50% of its production wells too, and Amoco Management did not like that at all. I was given the task of trying to figure out why with a computer. I was given a stand-alone minicomputer that had its own electrostatic plotter and some commercial seismic modeling software that could plot out simulated seismic sections based upon the input of a numerical geological model.

Figure 55 - A typical geological cross section model of the Gulf of Suez showing a couple of production platforms that were producing oil from the tilted fault blocks of the Rudeis Nukhul and Nubian sandstones.
What I did with the seismic modeling software was to start with the "official" geophysical and geological models that Amoco had used to drill production wells with. Then I found the average values for the density and speed of sound of the various rock layers that Amoco had drilled through. These average values were gained from numerous well logs. The end result was a numerical computer model for the minicomputer software. Based upon that numerical model, the minicomputer simulation software generated a simulated seismic section for the model. Hopefully, the machine-generated simulated seismic section would look very much like the actual seismic surveys we recorded in the field that were used to drill production wells. Then I could adjust the geophysical and geological models until I got a really good match to what we observed in the field on real seismic sections. That would then yield much better geophysical and geological models that we could then use to place our production wells. This was pretty cutting-edge stuff back in 1978, and most of the old-timer geologists and geophysicists in the Gulf of Suez exploration team were pretty skeptical of the new young kid with his minicomputer software.

Figure 56 - Above is a comparison of two synthetic machine-generated seismic sections with two actual seismic sections that were recorded in the field. The simulated seismic sections are on top and the real seismic sections are below. The simulated seismic sections were generated by simulation software that used values from well log data.
Now, the geology of the Gulf of Suez was heavily influenced by plate tectonics. When the area was first split apart by the Red Sea spreading center about 35 million years ago, the area subsided and was filled in by sandstone (yellow) and shale (green) formations. The sandstone came from sand grains that washed down rivers to the subsiding zone and the shale came from mud in the same rivers. When the area had opened up enough for the ocean to wash in, it formed a very narrow, shallow and highly restricted channel of salty seawater. Because this narrow channel was very hot and very restricted, evaporation caused thick layers of evaporites to be deposited at its bottom, consisting of salt and anhydrite layers. This evaporite formation was called the Zeit formation (pink layer in Figure 55), and it consisted of layers of salt and anhydrite interleaved with thin layers of shale. The shale layers came from mud that continued to be deposited by rivers into the very narrow, shallow and salty channel of the Gulf of Suez. As the area continued to subside and spread due to plate tectonics, normal faults then formed in the channel. Then over geological time, the bacteria and algae in the shales below the Zeit formation were cooked by heat and pressure until their organic molecules turned into oil and gas. The oil and gas then rose to the surface through pores in the sandstone rock until the oil and gas reached the Zeit formation. Then the oil and gas got stuck in the tilted upper ends of the sandstone fault blocks created by the normal faults because the oil and gas could not migrate through the salt and anhydrite layers of the Zeit formation. See Figure 55 for a depiction of this geology. So Amoco's job was to find the tilted upper ends of the sandstone fault blocks below the Zeit formation on seismic sections and drill them.

Figure 57 - Above is a modern-day seismic section from the Gulf of Suez showing the tilted fault blocks of sandstone beneath the Zeit formation and three production wells.
That was the problem. Figure 57 shows a modern-day seismic section from the Gulf of Suez. The seismic shows very strong reflections in the Zeit formation because the velocity of sound in salt and anhydrite is very high and the velocity of sound in shale is much lower. That produces very strong seismic reflections in the Zeit formation. However, Amoco was looking for the tilted sandstone fault blocks below the Zeit formation and not much energy was getting down to that level. The seismic data on the modern-day section of Figure 57 looks pretty bad below the Zeit, but back in 1978, it looked much worse on the Amoco seismic sections that I was trying to simulate on the minicomputer. What I did with the minicomputer software was to take the "official" geological models gained from the "official" seismic interpretations that Amoco used to drill wells and the sound velocity and densities of the rocks Amoco had drilled through from well logs and input them into the simulation software. But when I did that, the simulated seismic sections that the minicomputer software spit out did not look anything like the seismic sections we recorded in the field! Something was definitely wrong. No matter how hard I tried, I just could not get the "official" geological models to match what we saw on the real seismic data! Then on a lark, I created a really wacky software model that consisted only of the recent Pliocene deposits on top of the Zeit evaporite deposits, with nothing at all below them. This was like a huge slab of rock just floating in the air with no target tilted sandstone fault blocks below! I also turned on an option in the software for the simulation to include the generation of multiple reflections. To my surprise, when I printed out the computer-simulated seismic section of this model, it fit the actual recorded seismic data perfectly!

Figure 58 - The downgoing seismic sound waves were bouncing around within the strong reflecting layers of the Zeit formation, forming multiple reflections. These multiples arrived at the hydrophones at the same time that the primary reflections from the underlying tilted sandstone fault blocks arrived. These multiples interfered with, and totally obscured, the primary reflections from the tilted sandstone fault blocks that we wanted to use to site production wells.
To this very day, I still remember the first time I saw a machine-generated simulated seismic section for this wacky geological model roll out of the printer because it explained the whole thing. It was certainly worth several billion dollars! What was happening was that the digital signal processing techniques that Amoco had been using to process seismic data in the Gulf of Suez were slightly wrong. These digital signal processing techniques led to a problem with multiple reflections. What was happening was that some of the sound waves from the air guns on the seismic vessels were going down to the interleaved layers of evaporites and shales in the Zeit formation and bouncing around within them before returning back to the surface. On seismic sections, these are called "multiple reflections". Multiple reflections on a seismic section are essentially a mirage, like the "water" you see in the distance over a hot highway in the summer. Because the multiples from the Zeit formation were so strong, they were overwhelming the true reflections from the sandstone fault blocks below the Zeit. So for many years, Amoco had been blindly drilling holes based upon mirages. That was why they were hitting oil in 50% of their exploration wells and 50% of their production wells too. It turns out that there was so much oil in the Gulf of Suez that you could hit oil 50% of the time no matter where you drilled!
So what to do? I had just been on the job for about 6 months, and I now had software on a minicomputer telling me that Amoco had been processing its seismic data incorrectly for many years and blindly drilling wells based upon that misleading seismic data. I showed my computer-simulated seismic section to one of my older colleagues and he wisely suggested that I burn it in keeping with the lessons to be learned from Hierarchiology and the Phenomenon of Self-Organizing Organizational Collapse. But I was still very young and naive, so with much trepidation, I brought the results of my computer-simulated work to my new boss. To my surprise, my new boss accepted the results of my computer-simulated work with interest. He realized that many billions of dollars were at stake and that with some changes to the digital signal processing techniques that Amoco used to process seismic data, Amoco could produce much better seismic sections for the seismic interpreters. My new boss even had me give a presentation to the whole Gulf of Suez exploration team, and when the skeptical old-timers saw my computer-generated seismic section they too became immediate converts.
About 3 months later, Amoco announced that it was moving my whole exploration group to Houston, and my boss then helped me to get a job in Amoco's IT department in Chicago so that I would not have to return to Houston. So I finished out my career as an exploration geophysicist on a highpoint thanks to some seismic simulation software. I knew that if I were to work another 40 years as an exploration geophysicist it was highly unlikely that I would ever make a discovery with such economic impact.
This is why I am now so excited by the astronomical simulation capabilities of SpaceEngine. I think it could be hugely useful for researchers working on exoplanet stellar systems. There is nothing like seeing your exoplanet model rendered in a computer simulation!
Comments are welcome at scj333@sbcglobal.net
To see all posts on softwarephysics in reverse order go to:
https://softwarephysics.blogspot.com/
Regards,
Steve Johnston